Boost your CTR by making your product's main image stand out in the search results.




Welcome to the Ultimate Guide to Amazon Main Image Optimization. This guide is your practical, in-depth resource to help you craft main images that increase your product’s clickthrough rates (CTR) and conversions on Amazon.
Whether you're a beginner or a seasoned Amazon seller, we’ve packed this guide with actionable strategies to help you put your best foot forward. We’ll cover every aspect of optimizing your main image, from understanding its importance to testing it effectively with real consumers.
First, let us introduce ourselves – we’re the team at PickFu, a self-service consumer research platform that top Amazon brands, agencies, and aggregators use to optimize their product listings.
This guide is designed to be useful for both large brands managing multiple listings and small operations or individual sellers looking to maximize product visibility and sales. Whether you're dealing with the complexities of optimizing at scale or simply aiming to get the most out of your product listing, the strategies here are crafted to help you succeed.
✅ For a structured, step-by-step approach, our Main Image Optimization Playbook is waiting for you. Just sign up for PickFu or log into your account to access it.
🔥 For those who prefer to leave it to the pros, our Done-For-You service offers expert support every step of the way – from testing to graphic design.
The Amazon main image (sometimes called the hero image) is a shopper’s first impression of your product – often the deciding factor in whether they click into your listing or scroll past. It’s your best chance to attract attention in a crowded marketplace. A strong main image directly impacts both Amazon CTR (clickthrough rate) and conversion rates.
Imagine you’re shopping on Amazon for a new coffee maker. You’re looking at two products side-by-side in the search results page (SERP):
If pricing wasn’t drastically different, you’d most likely click into the first listing, right? And even if it was a bit more expensive, you might have enough extra confidence in the first listing that you’d click anyway. That’s how much the main image can impact shoppers’ decisions and trust.
For sellers managing a single listing, optimizing your main image can yield a substantial improvement in your return on investment (ROI). Even minor changes, such as improving lighting or adjusting the angle, can have a noticeable impact. For those managing many listings, the challenge is maintaining high-quality, consistent images across all products, which can significantly boost overall CTR and drive more consistent sales.
While the main image grabs attention, secondary images provide additional product details – measurements, use cases, and specific features. They should be clear, informative, and complement the main image without repeating it. Think of secondary images as the supporting cast: they provide the context and additional information that helps shoppers make an informed decision.
For instance, if your main image shows a kitchen appliance, a secondary image could show it in use, highlighting its key features or demonstrating its size in a typical kitchen setting. This approach gives potential buyers a clearer understanding of how the product fits into their lives.
To avoid overcluttering your main image or not meeting Amazon requirements, save detailed information for your secondary images. Include elements like product specifications, text callouts, and images showing the product in use in these secondary slots. This keeps your main image clean and focused while still providing all the necessary details to potential buyers.
🔥 Pro tip: A good way to quickly compare different image options is to use this Amazon main image test template. A panel of 50 Amazon Prime members will vote for which image they prefer and share written feedback about what they like and dislike, helping you narrow down designs and choose the best option for your main product image.

First of all, you can’t just do whatever you want in your main image. You need to follow Amazon’s product image requirements. There are several guidelines, but here are a few key points:
You can learn more about Amazon’s image requirements here.
Beyond adhering to Amazon’s requirements, your main image needs to convey quality and clarity. Here are the universal elements of a successful main image:
“Ask yourself: ‘Is this where my product belongs and is my offer competitive?’ If it’s yes to both, great – now how else can you stand out?” says Daniela Bolzmann, CEO & Founder of Mindful Goods. (Get more Amazon main image design tips from Daniela!)
Remember that different product categories have different best practices. For apparel, for instance, showing the clothing on a model often results in higher engagement, as it helps customers visualize fit and style. On the other hand, electronics perform better when shown with a focus on key features, like close-up shots that emphasize build quality and materials.
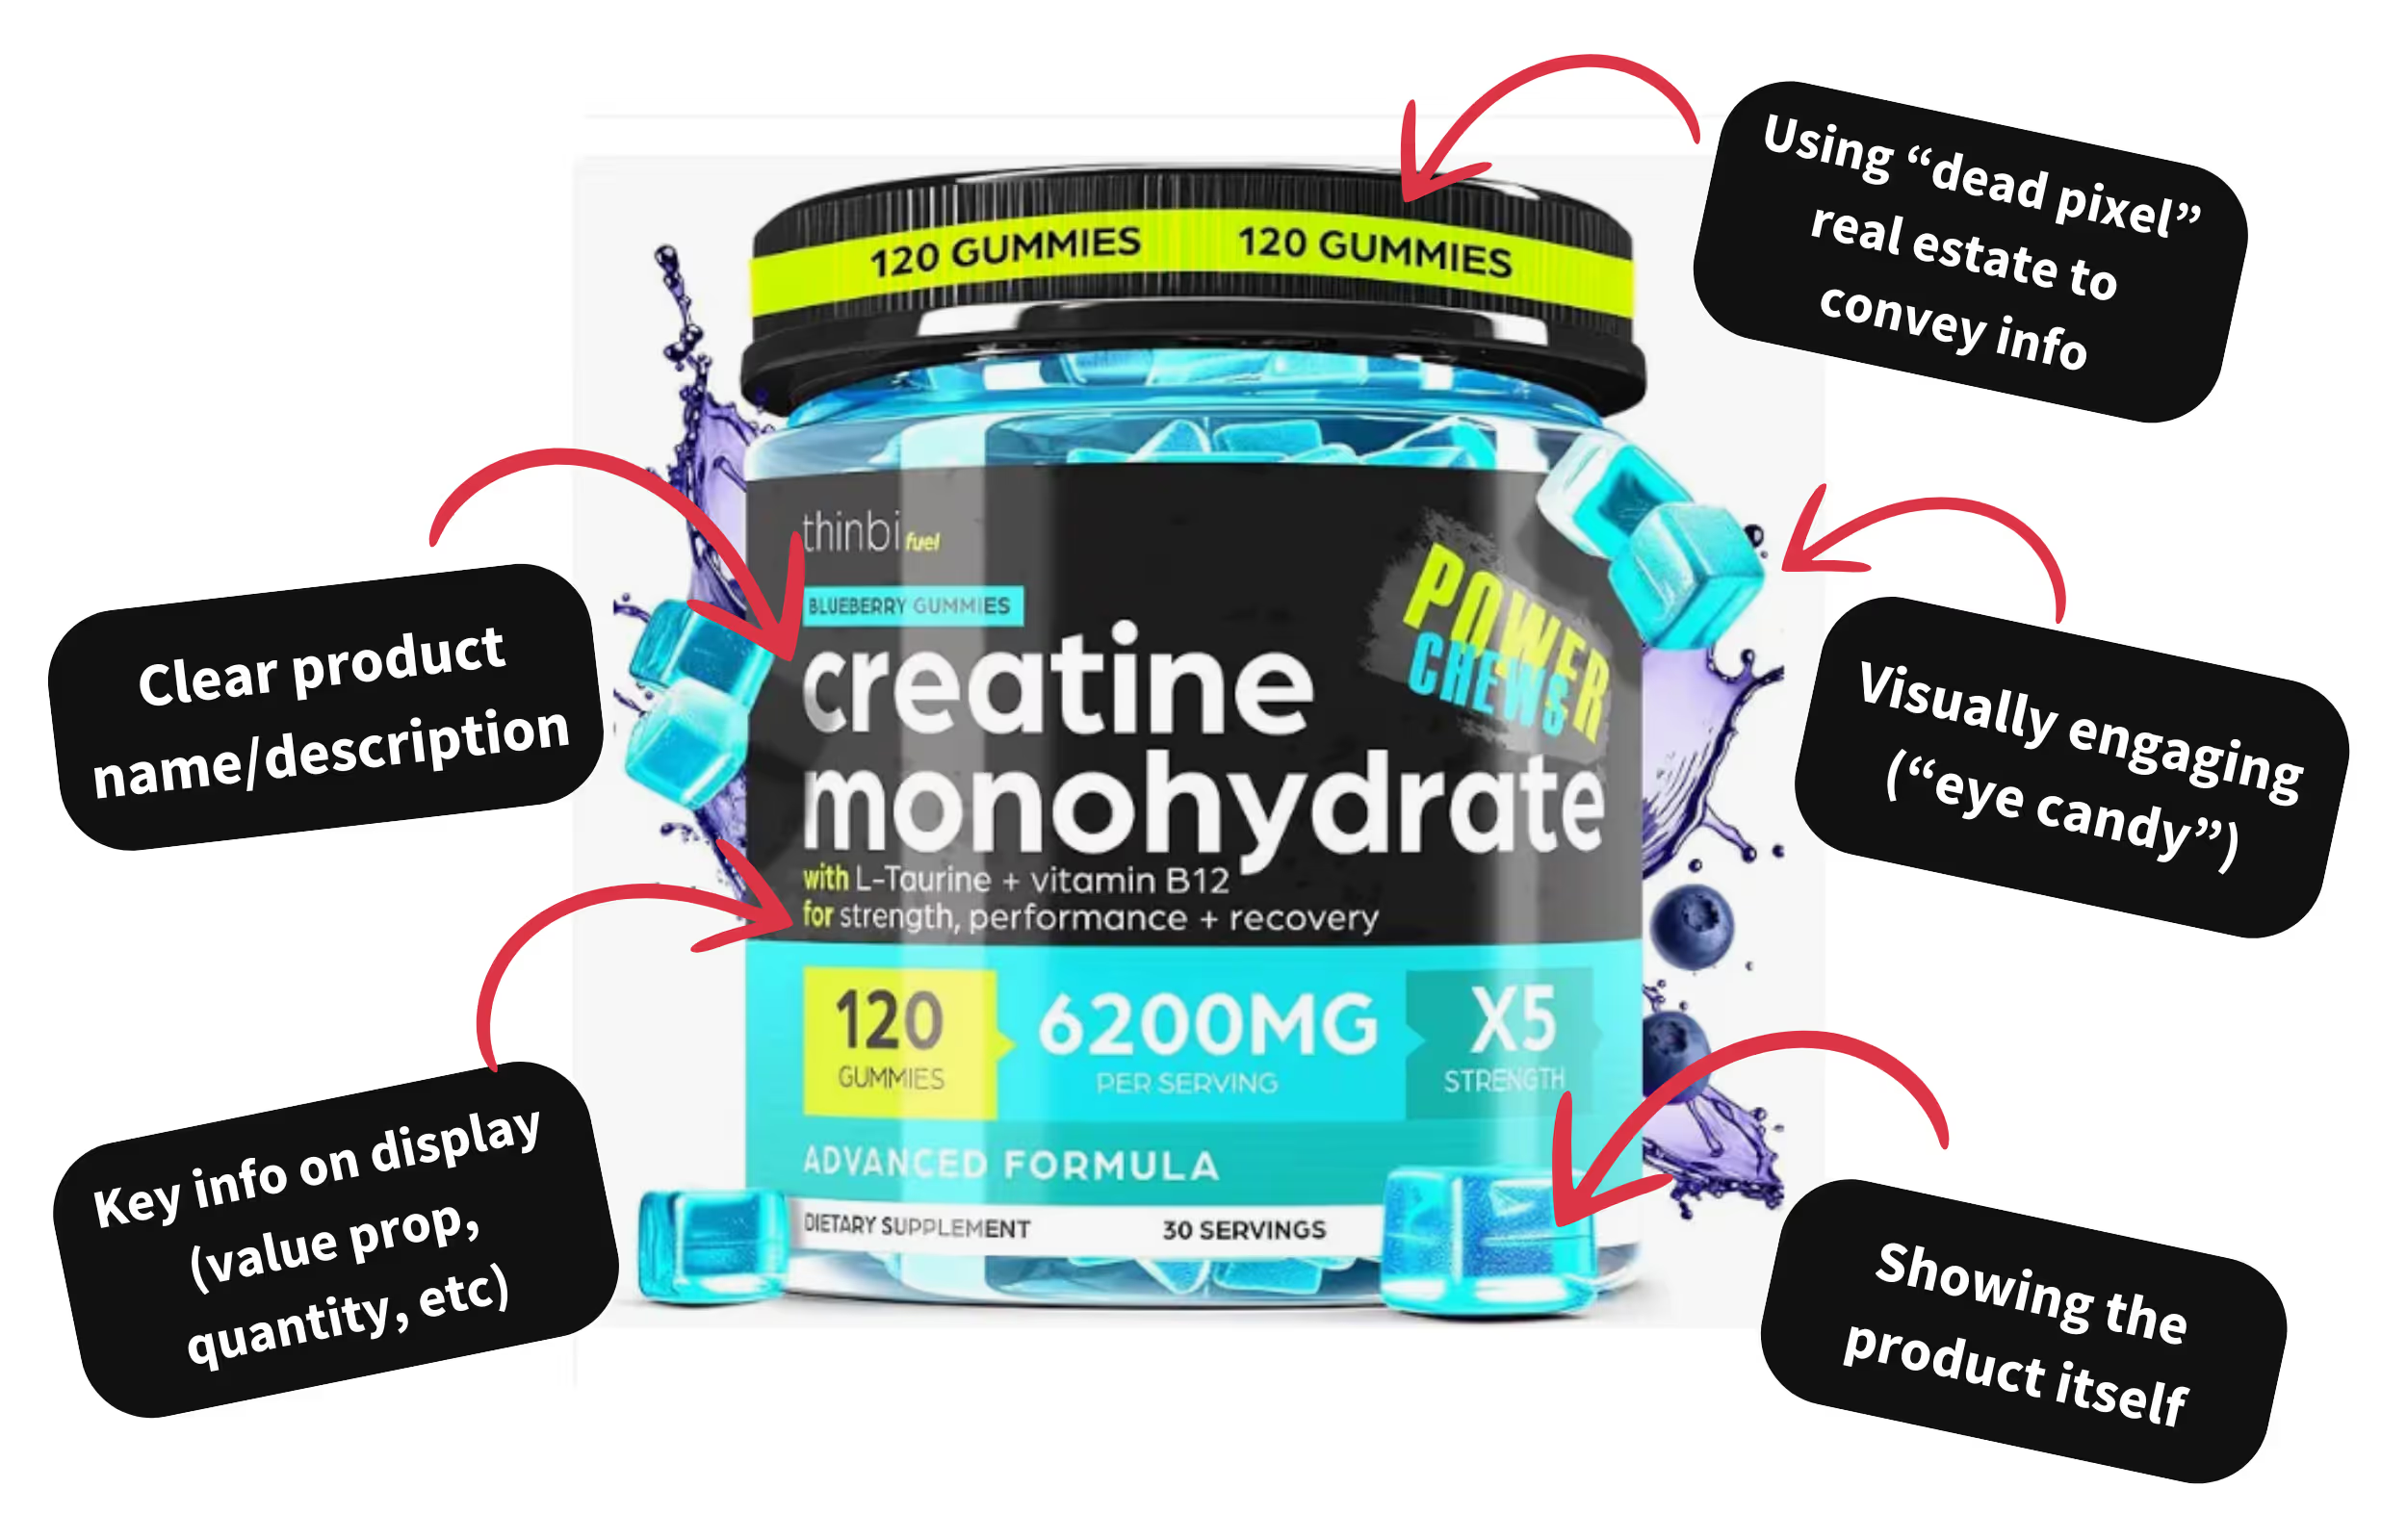
Visual hierarchy and psychological cues play a big role in customer decisions. When optimizing your main image, consider how different visual elements impact the perception of your product:
Avoid these common pitfalls when designing your hero image:
Suggestion: Use the Main Image Optimization Playbook to guide you through testing different aspects of your images and avoiding common mistakes. The playbook includes case studies and examples of how minor tweaks can lead to significant improvements in CTR.
Optimizing your main image involves a few strategic steps to ensure your product gets the attention it deserves. Before you dive into improving specific elements of your image, you’ll need to do some foundational work to ensure you’re headed in the right direction.
Step 1: Research best practices Before diving into changes, research general best practices specific to your product type. For instance, in home decor, lifestyle images showing the product in an attractive setting can drive engagement, whereas tools should emphasize clarity and show the product in a simple, easy-to-identify manner. Studying the category’s top-performing products can reveal what works.
Step 2: Analyze your competition Look at successful competitors to understand what makes their main images effective. Notice the angles, lighting, and presentation style. Are they focusing on a specific feature that makes their product stand out? For example, if your competitors are showcasing their product's unique packaging, consider whether that’s a key feature for your audience too. Learn from their strengths, but also identify areas where you can do better – perhaps by presenting your product in a cleaner or more engaging way.

Step 3: Understand your target audience Think about (and do some work to discover) what your audience cares about most. For example, if you’re selling outdoor gear, your target audience probably values durability and ease of use. Or if you’re selling an electrolyte powder, they might care more about flavor. For a lemon-flavored electrolyte powder, for example, you could add a picture of a lemon next to the packaging to clearly show the taste. Make sure the most important elements to your audience are evident in the hero image – and supported by your secondary images and keywords.
How do you understand what your target audience wants? One way is to analyze the product reviews of your own products AND your competition. Reviews are a great way to get insight into what your audience likes and dislikes about products like yours. Look for trends, including feature requests, common complaints or sticking points, and favorite designs.
Once you’ve nailed these foundational steps, create and test variations of your main image. Testing will help identify which elements resonate most with your audience, leading to higher engagement and conversions. We’ll dive into best practices for testing, plus our recommended step-by-step process, in the sections below.
Tools for DIY optimization: If you’re working on a budget, DIY tools like Canva or Adobe Creative Suite can help you edit and enhance your product images. For those looking for professional help, hiring a freelance graphic designer or partnering with an e-commerce creative agency can make a big difference in quality. (We also have an in-house service at PickFu for end-to-end main image optimization, including design).
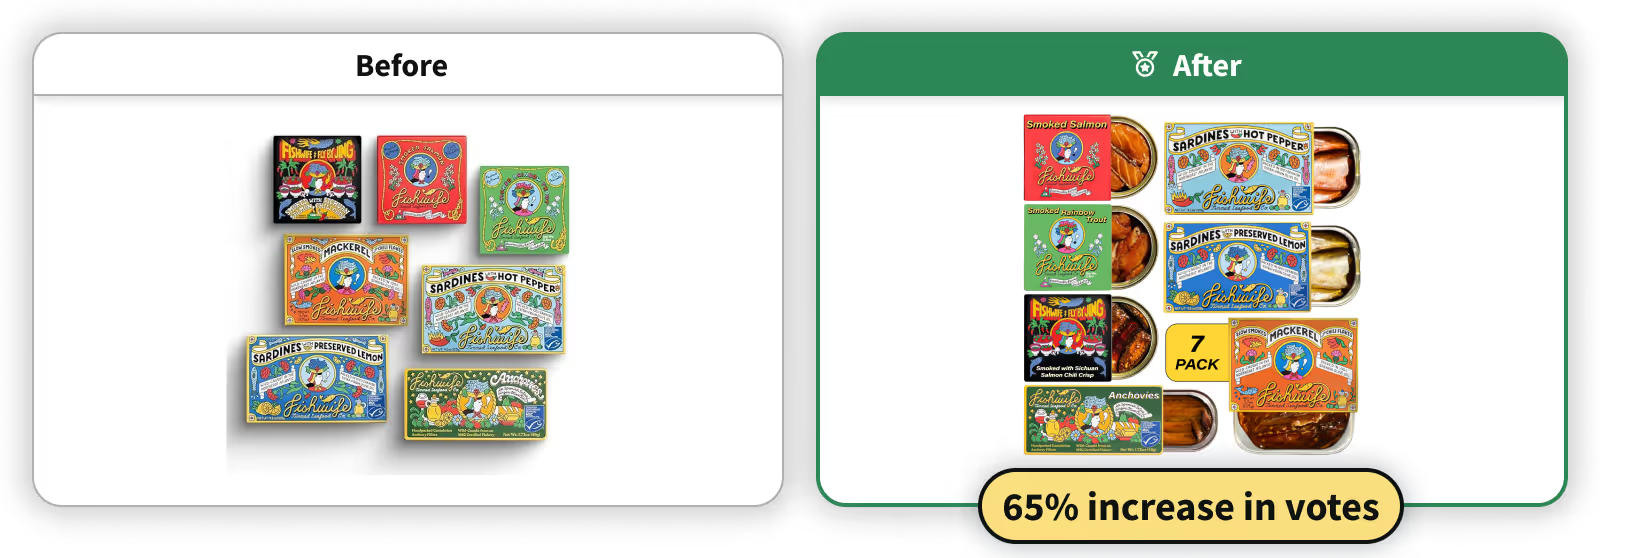
Testing your main image isn’t just helpful – it’s essential. Without testing, you’re relying on assumptions about what resonates with your audience. Testing allows you to gather concrete data on consumer preferences before committing to an image. This approach is particularly useful if you’re torn between two different images or if you’ve made significant changes and want to validate their impact.
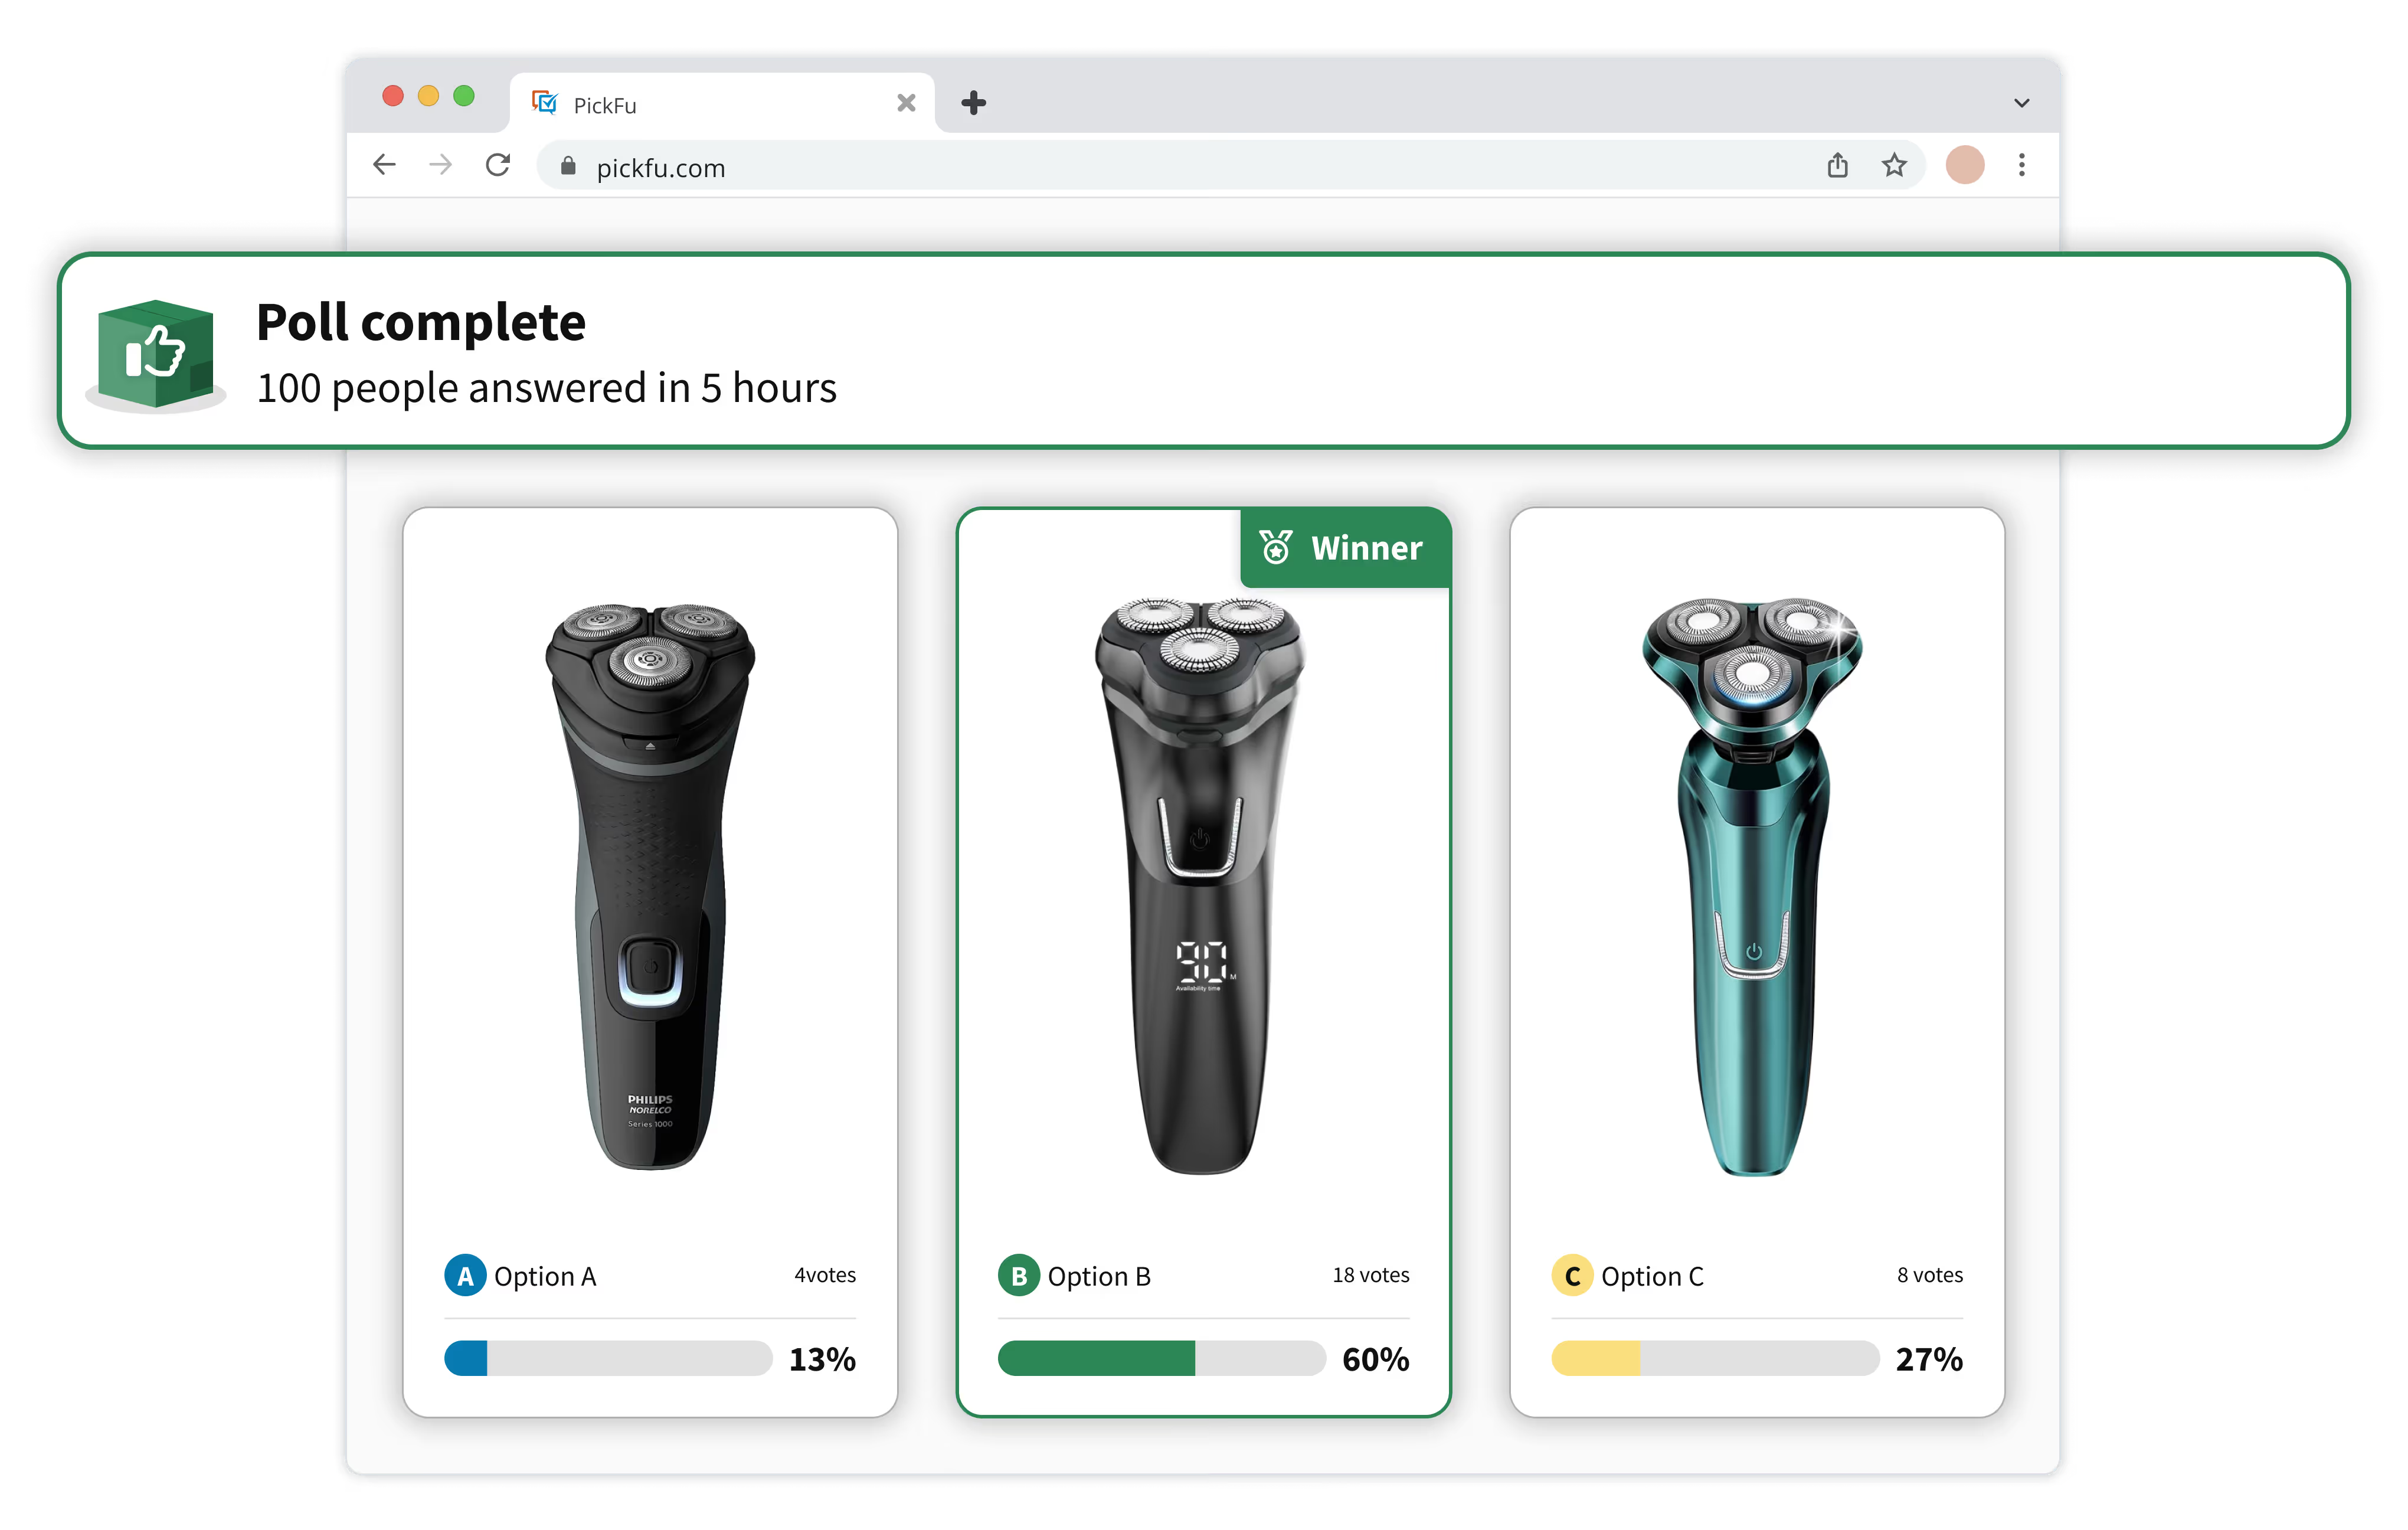
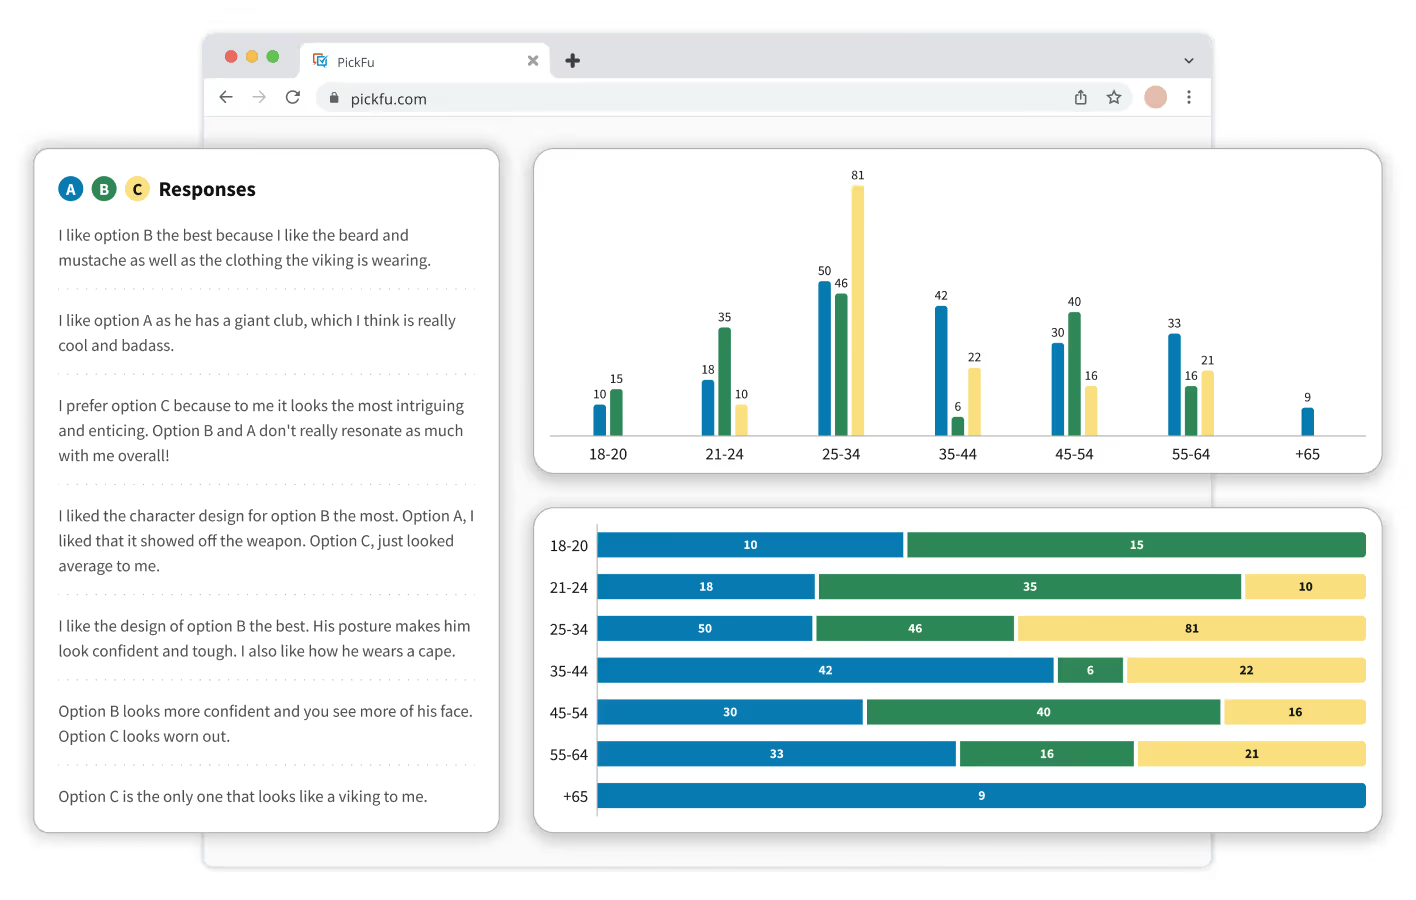
This is where PickFu comes in. PickFu is an Amazon listing optimization tool that allows sellers to test their main image (and other product or listing elements) with a built-in panel of consumers in their target audience. Sellers can build a poll or survey, upload the images they want to test, and within the same day – often even within an hour – real people will vote and provide qualitative feedback on what they like or dislike about whatever you're testing.
This process helps sellers make informed decisions quickly, ensuring that their listings are optimized for maximum engagement.
Our Main Image Optimization Playbook provides detailed steps on how to set up effective tests, as well as an expert-recommended flow for testing.
Sellers will already be familiar with Manage Your Experiments (MYE), Amazon's own tool that lets you run live A/B tests directly on Amazon, comparing two versions of your listing over a set period. It’s ideal for validating final choices once your listing is live, but results take time, and you must already have enough traffic to generate meaningful data.
Unlike MYE, PickFu allows you to do Amazon split testing before your images before they go live. This means you can optimize your main image based on feedback from real consumers in your target audience, often within a few hours. It’s a fast, affordable way to make data-driven decisions before your image is seen by thousands of potential customers.

PickFu is a powerful complement to Amazon’s Manage Your Experiments. While MYE helps validate your final image in the real world, PickFu allows you to iterate faster, using consumer feedback to decide between different images early in the process. PickFu isn't live testing, so you're not automatically showing a worse version of your image to some of your shoppers. Instead, you can gather valuable insights without risking a dip in conversions due to a potentially suboptimal image.
PickFu also provides results much faster than MYE – you don't have to wait for weeks for data to accumulate. With PickFu, you can receive feedback within the same day, often even within an hour. This speed allows you to make quick adjustments and refine your image before launching it live.
Using PickFu first helps you narrow down and validate your image direction, ensuring you're putting forward the best possible option. Once you've refined the image with PickFu, you can then use MYE to confirm that it's working effectively in a live setting on Amazon, providing a comprehensive approach to image optimization.
-2.avif)
Follow the steps below to start optimizing your main image using PickFu. This flow is recommended by our team to get you the best insights and results. Even better, it’s been proven by our customer base of Amazon sellers and agencies (see the section below for success stories).
We dive into more detail on each one – including links to pre-built testing templates you can use, insider Amazon tips, poll examples, and more – in the PickFu Main Image Optimization Playbook. Just sign up for a free PickFu account to access the playbook and start running these tests on your own listings.
Here are the basic steps for successful Amazon main image optimization:
1. Figure out your target audience. If you don’t reach the people who actually want to buy your product, you won’t get relevant insights. Check your Brand Analytics in Amazon to discover your key customer demographics. Or you could run an Open-Ended poll with PickFu to see who your product resonates with most.
2. Compare your current main image against your top competitors’ images. This will help you get a baseline understanding of your image’s strengths and weaknessess – and what your target audience prefers about the competition. The insights you gain in this phase will help you decide specific tactics for improving your image.

3. Iterate on your main image design based on your competitor analysis and audience feedback. Come up with at least two variations you can test against each other to find the best option. Adjust your designs based on feedback and continue testing until you have a solid winner.

4. Validate your new main image by testing against your original competitors. Run the same test as in Step 2, but this time using your new and improved image. This test will help you verify whether the new main image stands up against the competiton, or if further adjustments need to be made.
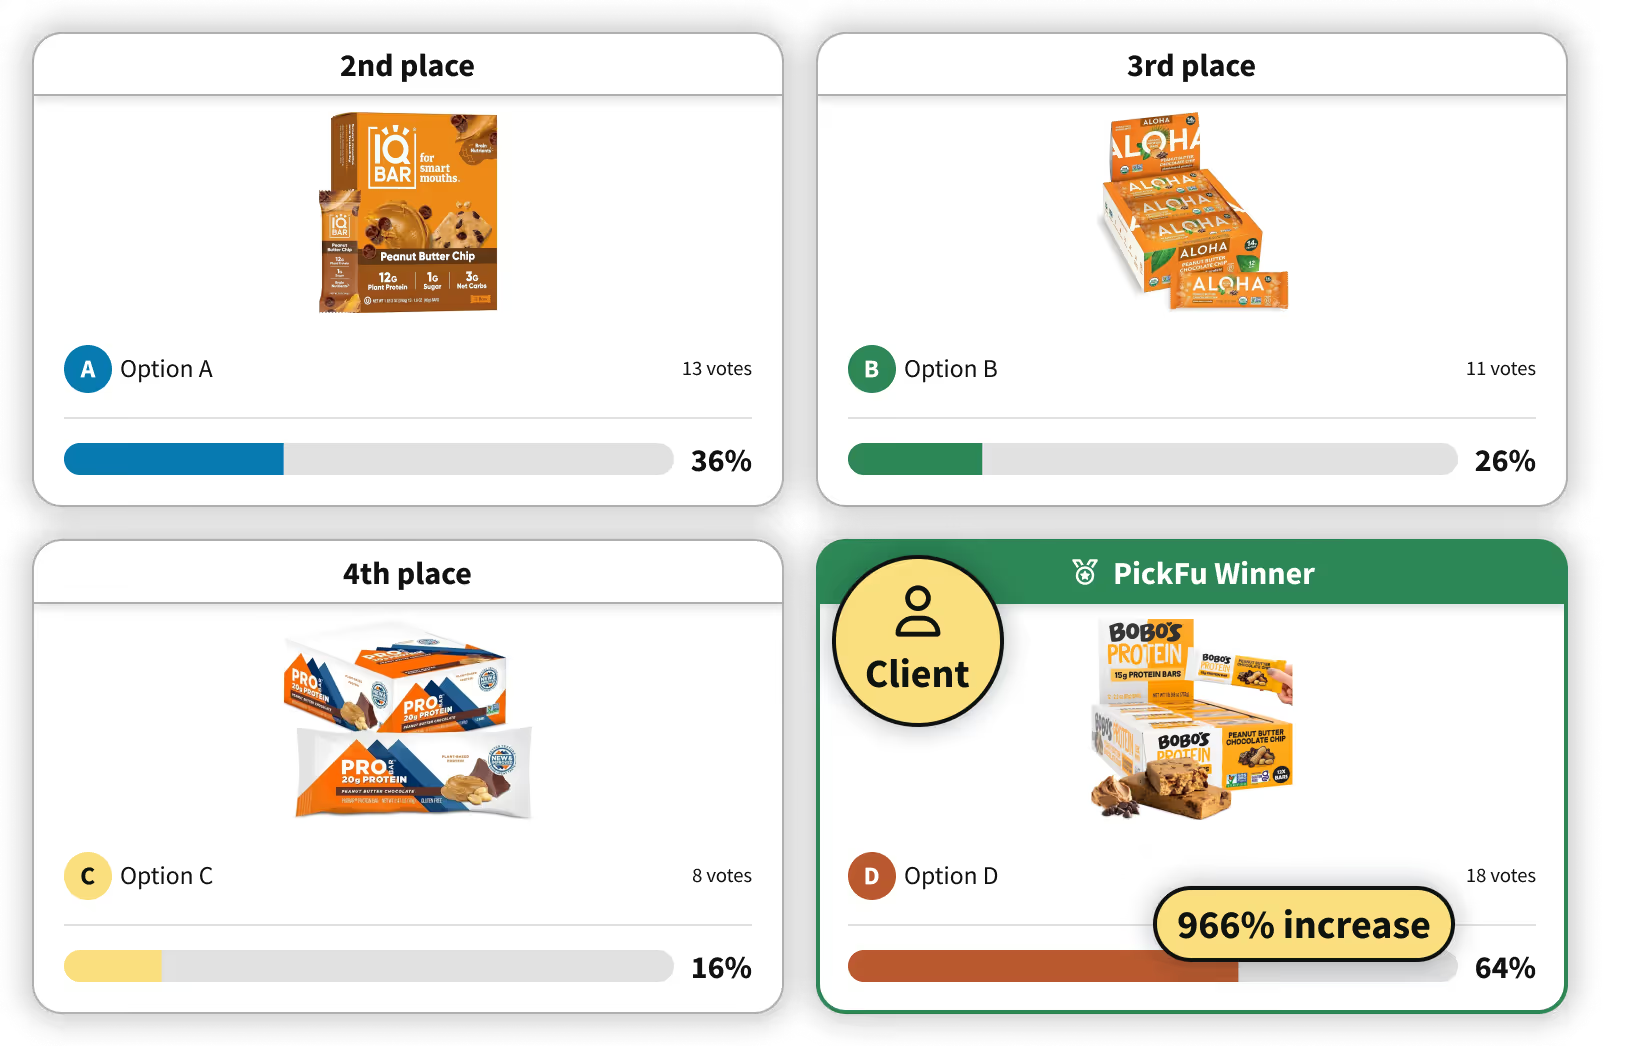
5. Launch your new main image! Wait to evaluate its performance for at least 4 weeks. Repeat this optimization flow again after about 6 months.
Get the Main Image Optimization Playbook for more details on each of these steps. The playbook will provide you with a structured sequence you can use repeatably for testing and optimizing your images. Simply sign up for a free PickFu account to access it.
Want more 1:1 guidance? Consider our Done-For-You service. If you’re managing multiple listings or want to outsource the process, this service provides full support from our team – covering everything from running tests to creating high-quality, conversion-optimized images.
Once your new image is live, monitor its performance through Amazon Seller Central analytics. Keep an eye on key metrics such as CTR, conversion rate, and overall sales volume. Compare these metrics against the previous period to determine the effectiveness of your changes.
General Tip: Let your new image run for at least 4 weeks before evaluating its impact. This time frame allows you to gather enough data to draw meaningful conclusions. Additionally, consider retesting or refreshing your main image every 6-12 months. Trends change, and keeping your images up-to-date will ensure you stay competitive.
Need more proof that main image optimization works?
Our team at PickFu has helped countless Amazon brands, agencies, and aggregators improve their product listings and boost sales.
Here are just a few results our customers have seen:
📈 After YES Bar optimized its main image with PickFu, traffic to the listing increased 12% in just two weeks – translating to an additional $3,390 in revenue.
🧡 “75% of our winning PickFu polls result in increased sales for our clients.” - Daniela Bolzmann, CEO & Founder of Mindful Goods
💰 Angry Orange scaled revenue by 10x after optimizing its listing photos with PickFu.
1️⃣ "Within a few days of launching our PickFu-optimized product image, we were ranking on the first page." - Jeff O’Bryant, CEO & Co-Founder of Leap Stores
🔥 Nick Zarlegna, founder of the Truth or Dare Date Night card game, increased his Amazon sales by 133% after using PickFu’s Done-For-You service to improve the main image.
To get the best results, leverage Amazon product research tools like PickFu, Helium10, and Jungle Scout. Each of these platforms offers unique capabilities:
These Amazon FBA tools provide valuable data insights and help you understand what’s working in your product category.
For those who prefer a DIY approach, consider tools like Canva and Adobe Creative Suite. These tools can help sellers significantly improve images taken without a professional photographer.
Canva offers user-friendly editing features, such as cropping, adding filters, enhancing brightness, and incorporating simple text overlays to highlight key product features. It's particularly useful for sellers who need quick, easy edits without technical expertise.
Check out our Canva main image optimization masterclass for tactical tips on using Canva to improve your Amazon hero image!
Adobe Creative Suite (specifically Photoshop and Lightroom) provides more advanced editing capabilities, allowing for precise adjustments to lighting, color balance, and retouching, which can make amateur images look professional. Sellers can use these tools to remove imperfections, adjust colors to make the product pop, and create consistency across multiple product images.
If you need higher-quality images or lack the expertise, working with an in-house or freelance photographer can elevate your images to a professional standard. Good photography is an investment that can yield significant returns in the form of higher engagement and sales.
Optimization is a continuous process. This guide gives you the tools to start, but your best results come from simply getting started.
Ready to start testing?
Sign up for a free PickFu account to access our Main Image Optimization Playbook. You’ll get a step-by-step breakdown of our recommended flow for testing and optimizing your Amazon hero image – created by our internal team and proven by real Amazon sellers. The playbook also includes more insider tips, including how to improve your image based on your product category.
👉 Sign up or log in to get the playbook!
Need more support? Try our Done-For-You service – we’ll do the research, improve your image with our professional design team, and validate your optimized image against your top competitors. You’ll be able to share feedback and get the insights at every step, without having to do all the work yourself.
👉 Explore our Done-For-You main image optimization service!
Let’s make your Amazon main image work as hard as you do – attracting more clicks, more sales, and more success.
The Amazon main image is the first image shoppers will see on the search results page before clicking into your product listing page. Since this is the primary photo you’ll use to drive clicks and sales, it’s very important to make a good first impression with your main image.
According to Amazon’s requirements, product images must be at least 1,000 pixels on the longest side and 500 pixels on the shortest side. They cannot be more than 10,000 pixels on the long side. Many experts recommend a resolution of at least 2,000 pixels on each side to ensure the highest quality photo display.
Yes, it’s worth optimizing your Amazon product listing. A minimal investment in improving your product images, description, and other elements can result in a big increase in conversions and sales. For example, YES Bar spent just $85 on one PickFu main image optimization test – leading to a 12% increase in listing traffic and an additional $3,390 in revenue in only two weeks.
Key requirements for Amazon main images include: pure white background; no text, logos, watermarks, or other graphics over the product photo or in the background; must show the entire product; no mockups or illustrations of the product (must be a professional photograph); and other category-specific image requirements.
Ways to improve your Amazon click-through rate include: A/B testing variations of your main image; asking your target audience which image they prefer with a research tool like PickFu; and ensuring your image is clear, high-quality, and eye-catching.

Stand out from the competition with products that customers love.
Sign up for free and launch your first poll in just a few clicks.