It’s hard to believe that writers used to pen entire novels by hand. It makes sense that some revered works of literature are extremely long and wordy, because they didn’t have a digital word processor to help them cut, shape, and perfect their books. Word processors like Microsoft Word have made books leaner, cleaner, and more powerful than ever before. But if you need help knowing how to write a book in Word, you’re not alone.
New writers often sit down with a head full of dreams and ideas and then find that something as seemingly simple as formatting completely derails them.
In this guide, you’ll learn everything you need to know about how to format a book in Word. (For tips on writing the actual story, see our guide to beginning a novel.) While none of my novels have been published yet (they’ve come close!), they’ve all been written with Microsoft Word.
It’s an excellent tool for writers everywhere.
Writing and formatting a blank document
I find that it’s easiest to put your manuscript in the right format from the beginning rather than trying to change everything once you have a draft down.
Did you ever wait to cite your sources until after you
Whether you have sources to cite or not, it’s easy to format your book to look like a real manuscript on Word.
Here’s how to do it.
Put everything in one file
I’ve always liked to write an entire manuscript in one file. When I make revisions, I copy and paste whatever I’m about to cut or change and save it as a file labeled ‘Scraps’ so I can access it later if I want to.
Some of my author friends prefer to write every chapter in its own file, combining all the pieces later in the writing process.
Either way works fine, but keep at least one file — maybe the first chapter or section of your book — in the proper format so that you can copy and paste all your work into it when you’re done drafting.
Just so you know, I’m working with Office 2019 for Mac here. But the instructions should be similar no matter which version of Word you’re using.
Here’s how to get your book into manuscript format, a basic style that can easily be tweaked to satisfy the desires of agents, editors, and publishers everywhere.
Create a blank document
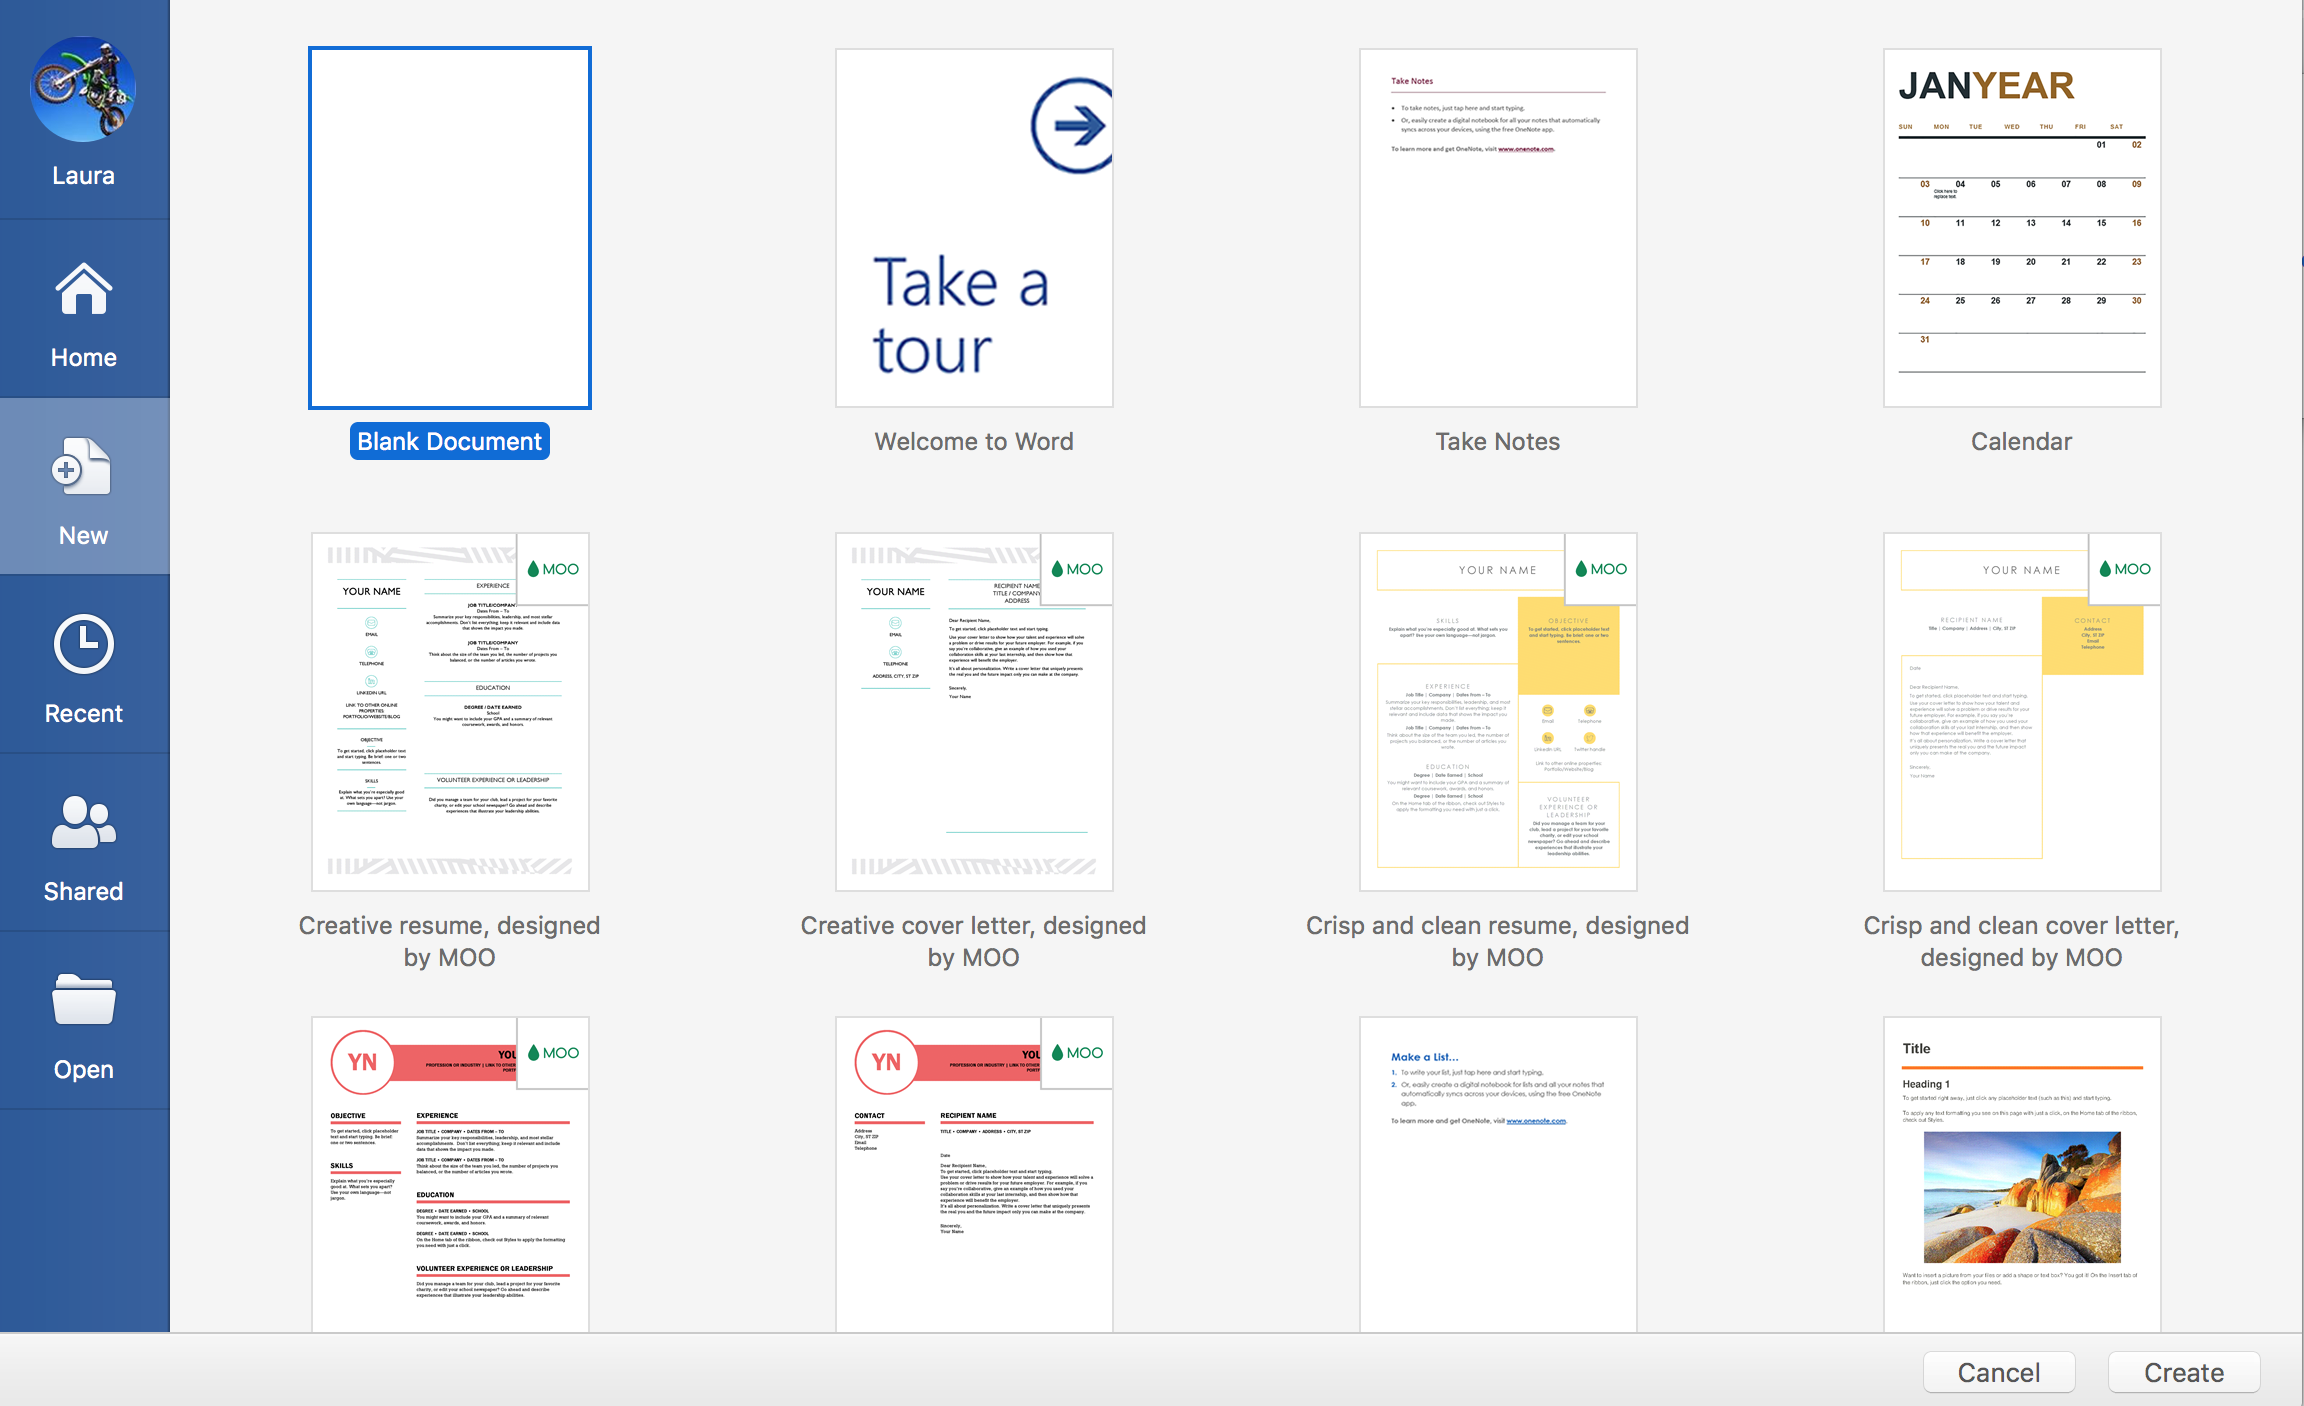
The first thing you should do is create a blank new document.
Craft your title page
This is one of the more exciting steps to formatting a book in Word. There’s nothing like the crisp, official look of your manuscript’s title page.
It’s the first thing an agent or editor will see, so it needs to sparkle.
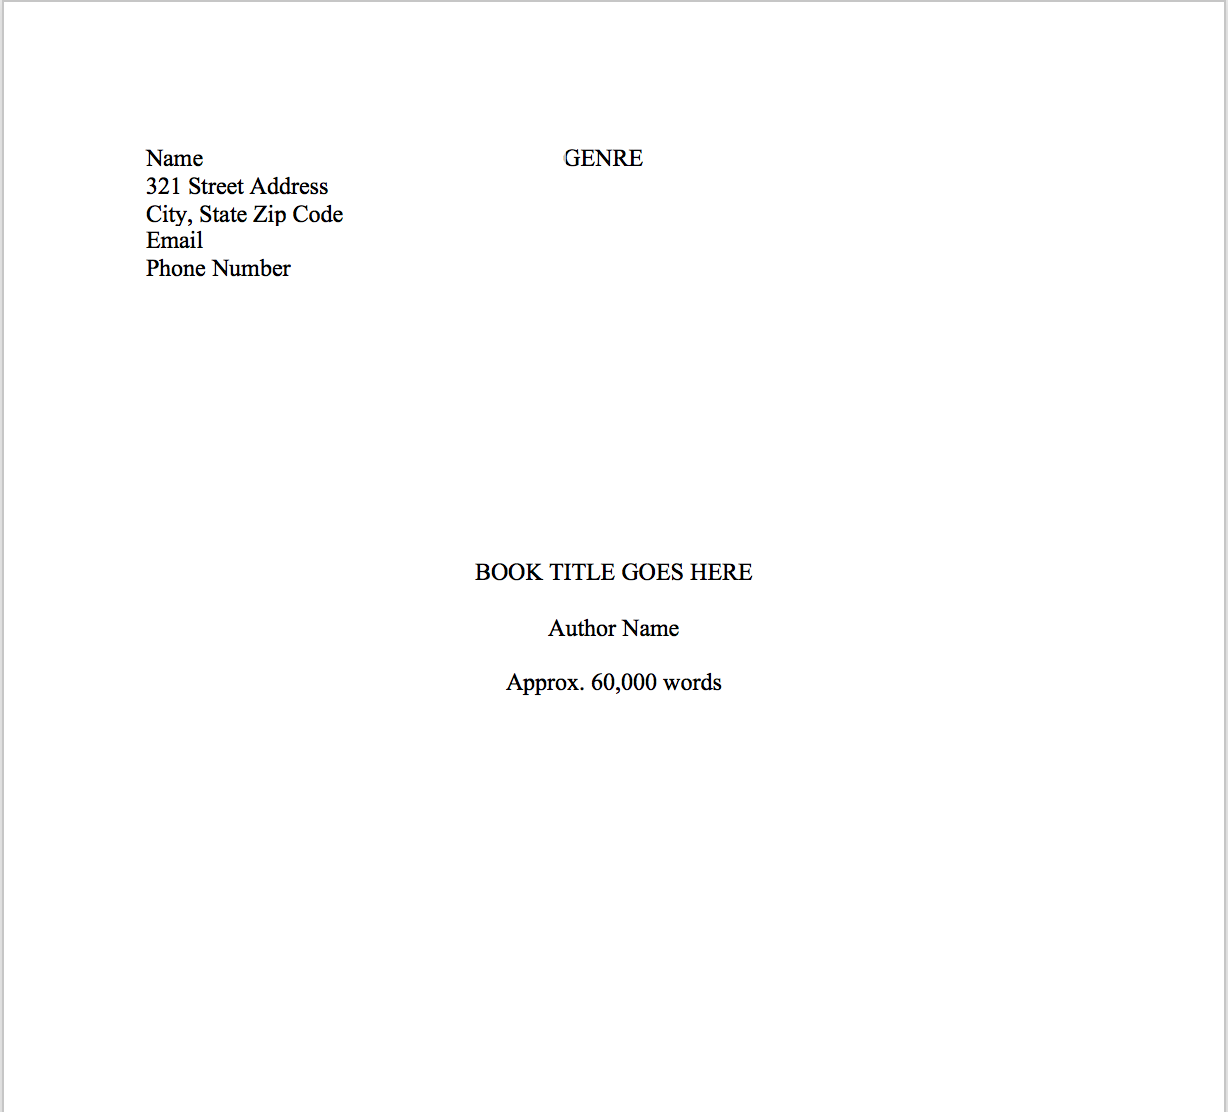
Here’s what to include:
- Your contact information in the upper lefthand corner of the page, formatted in single-space with left-hand justification.
- The all-caps title (and subtitle, if applicable) of the book 1/3 to 1/2 of the way down the page, center-justified.
- Your author name, which can be the same as your legal name or a pen name, one double-spaced line below the title, center-justified.
- The word count of your
book, rounded to the nearest thousand, one double-spaced line below theauthor name. - The genre of the book, abbreviated:
- Picture book: PB
- Middle grade: MG
- Young adult: YA
- New adult: NA
- Science fiction: SF
- Science fiction and fantasy: SF/F
- Urban fantasy: UF
- Paranormal romance: PNR
- Literary fiction: LF
Here’s a visual guide to help you out:
In the next step, you’ll create a header and insert page numbers, which will not begin on the title page but on the page directly after it.
Header and page numbers
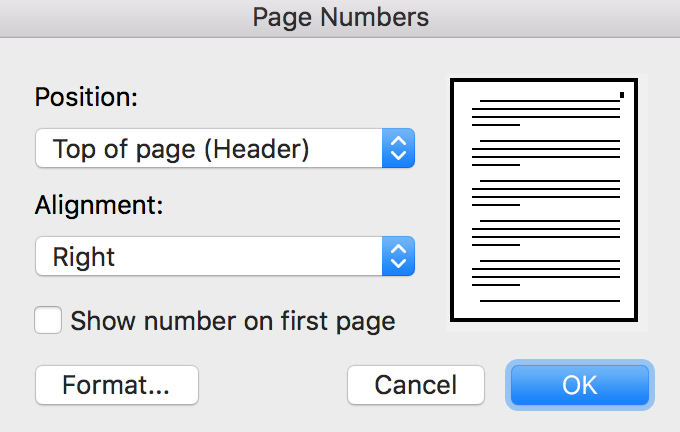
Before you work on the header, set the page numbers. To do this, navigate to Insert > Page Numbers and set the position to Top of page (Header) and the alignment to Right. Uncheck the box Show number on first page.
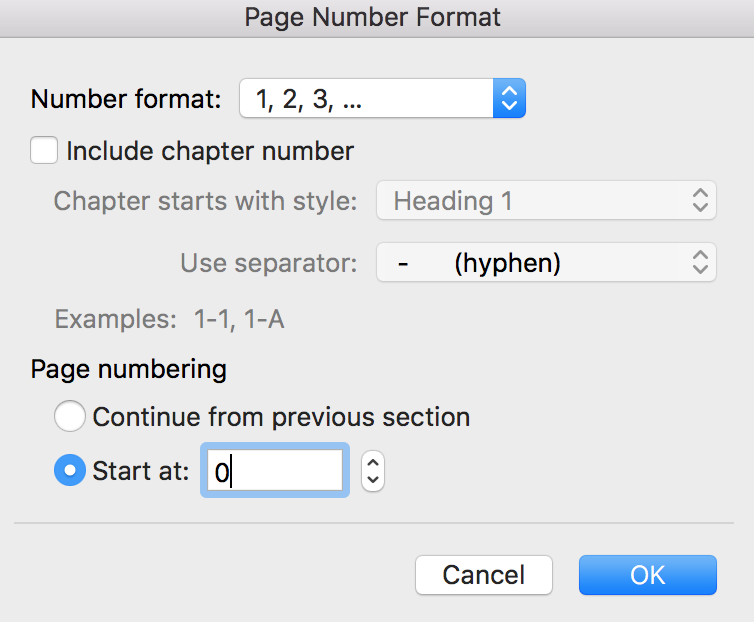
Next, click on Format, where you’ll see this:
Set the page numbering to start at 0.
Now navigate to your document and double-click on the page number 1.
A ‘Header’ box should appear, like this:
Double-click the number 1 and add your author name and the title of your book in all caps, just like this:
This professional header will now appear on every page of your manuscript.
Font specifications: don’t stray from these!
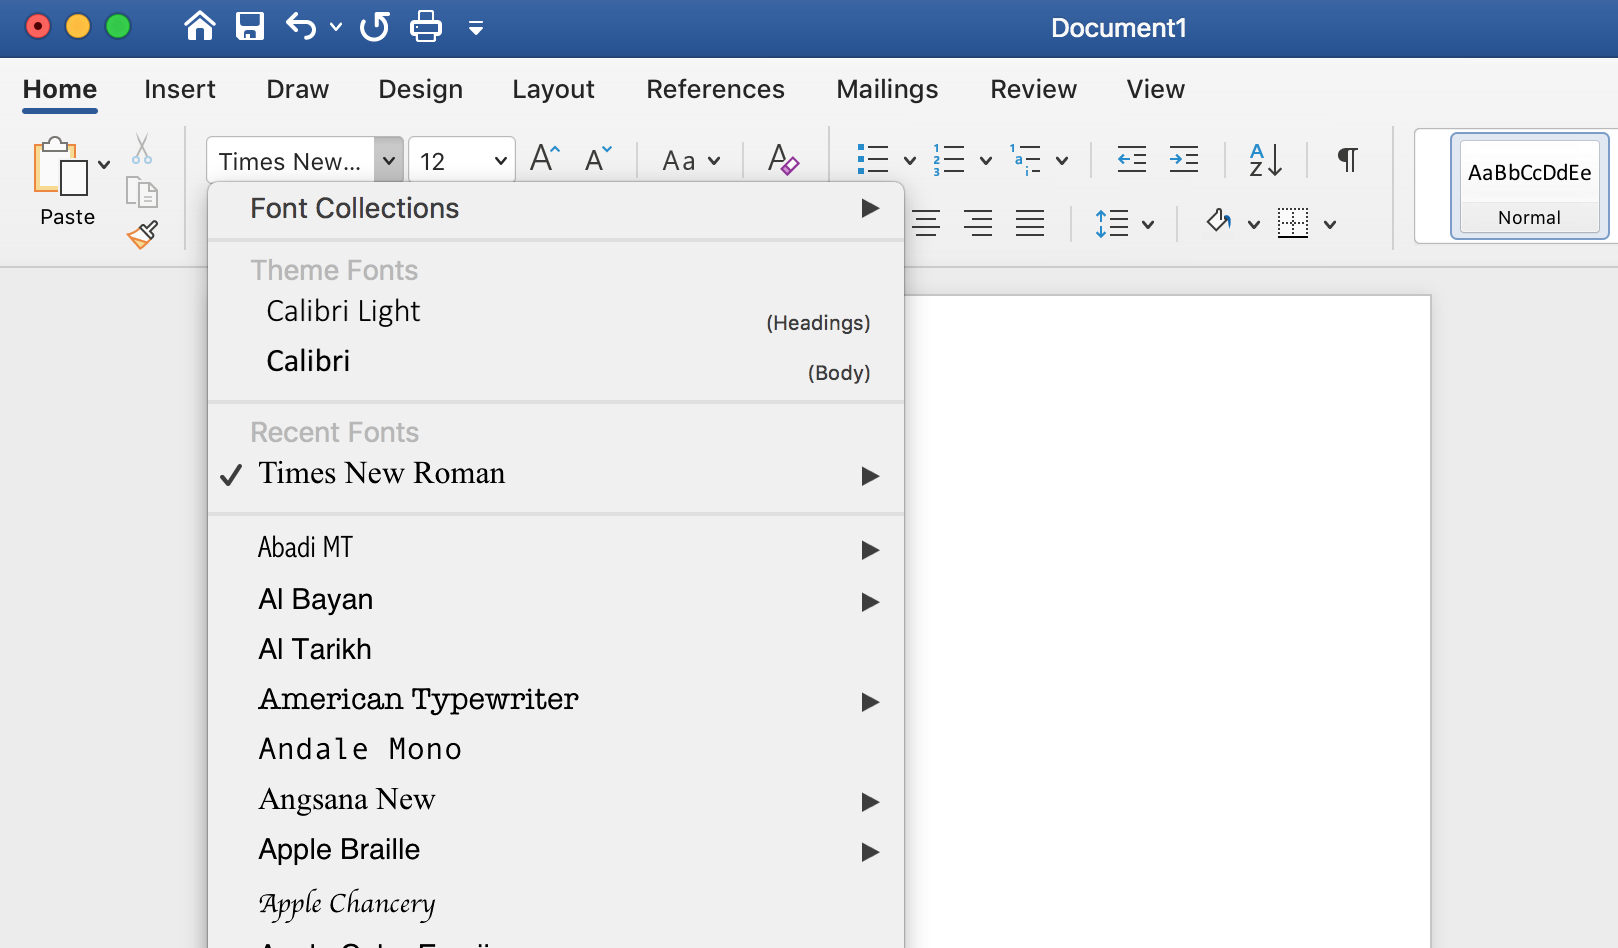
Now it’s time to get to the rest of the document. Set the font to black Times New Roman 12-point font, which is nearly universal across computers everywhere.
You may be tempted to use the font you feel best matches your book, but that type of styling comes much later in the writing process. Once the book itself has been written, edited, and polished, that is.
So for now, stick to the font that everyone loves and can easily digest.
Page size, margins, and justification
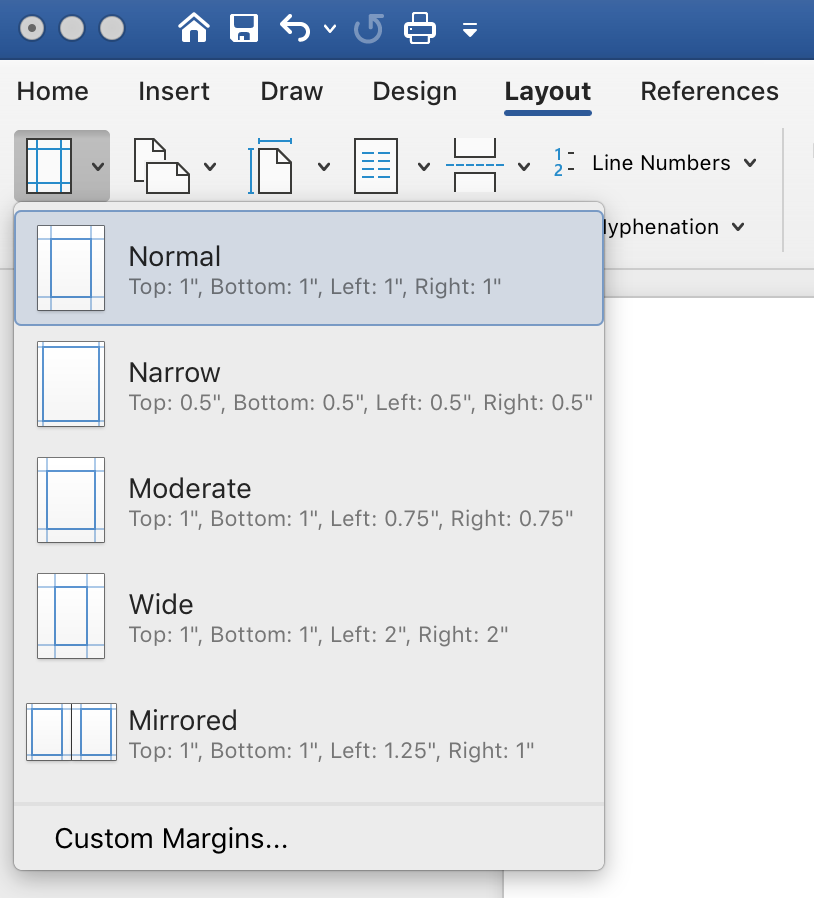
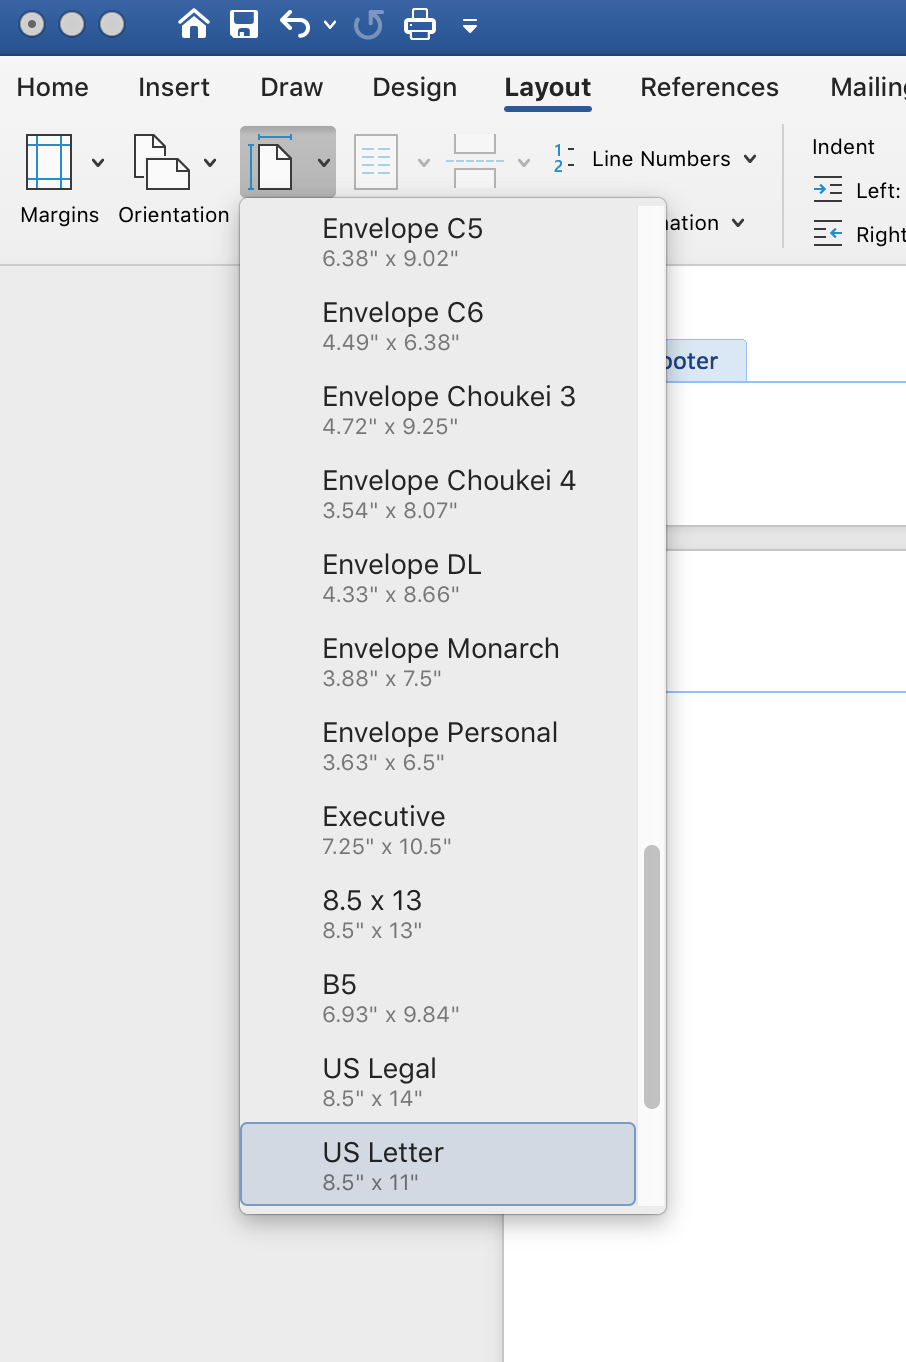
Next, make sure the page size is 8.5″ by 11″, with one-inch margins on all four sides.
Navigating to Size will show you what the page size is and allow you to change it if necessary.
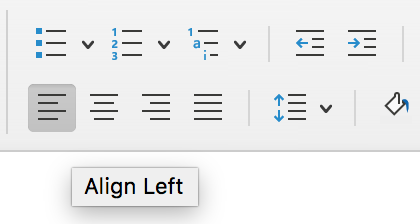
Now, make sure the document is left-justified.
Always double-space
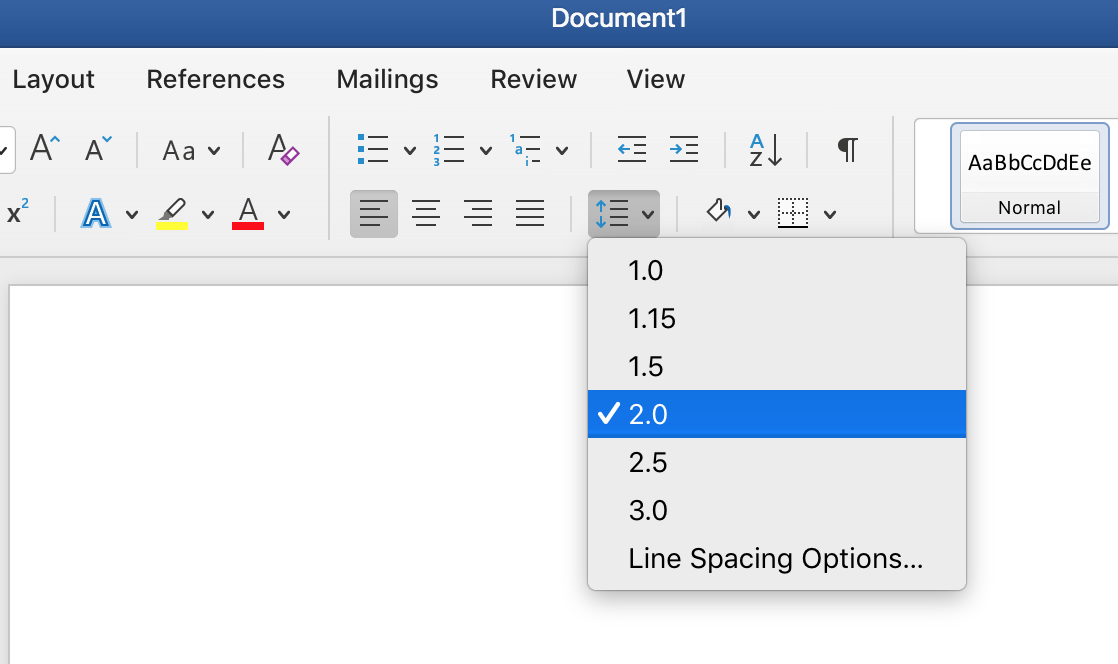
Adjust the spacing to 2.0, or double-spaced. Nearly every editor on earth will want to see double-spaced manuscript pages, including those you hire before you self-publish a book.
Paragraph indentation
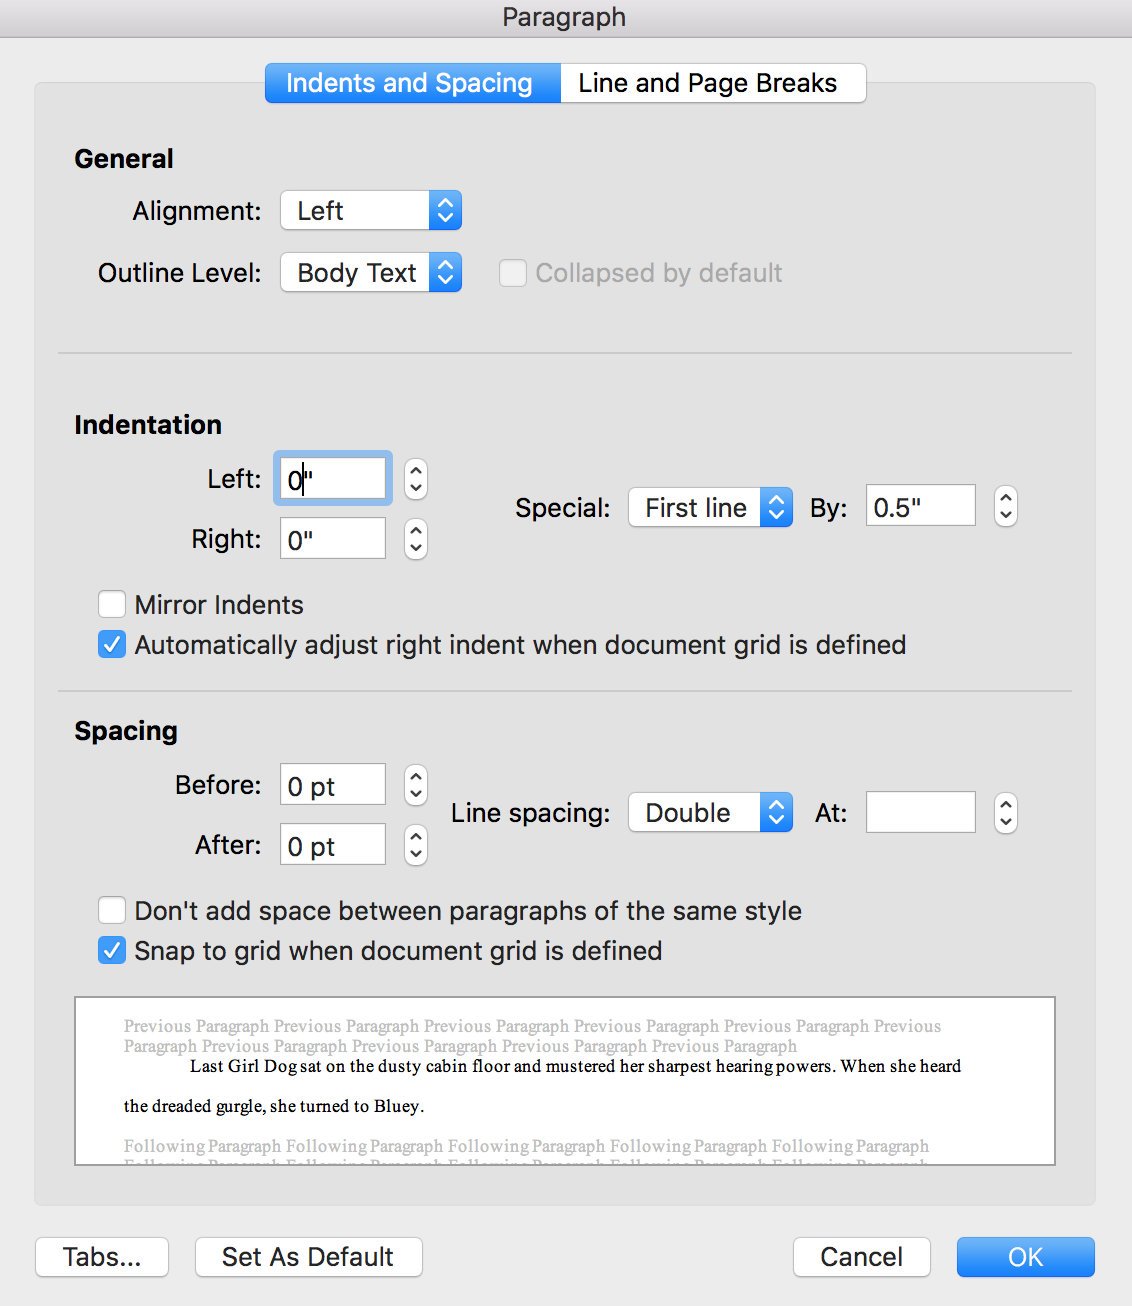
Instead of using tabs or spaces to create each paragraph indentation, navigate to Format > Paragraph > Paragraph Settings > Indentation > Special > First Line > 0.5 inch.
Now, each time you press return to create a new paragraph, it’ll automatically format the correct indentation.
Create page breaks
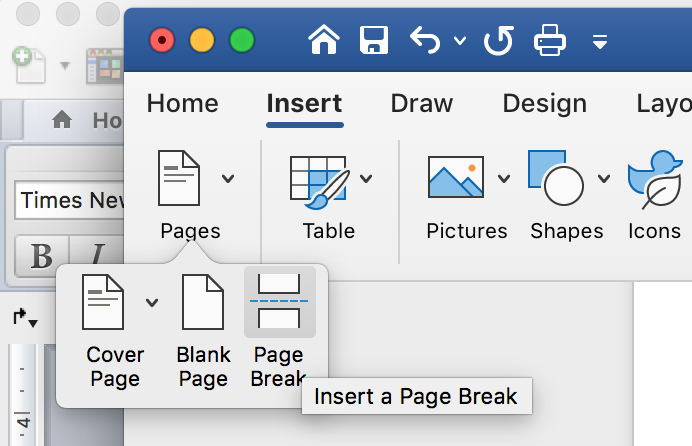
At the end of each chapter you write, select Insert > Pages > Page Break. This creates clear separations between chapters that will translate easily to print.
We’ll talk more about how to format chapters in just a moment.
The ending
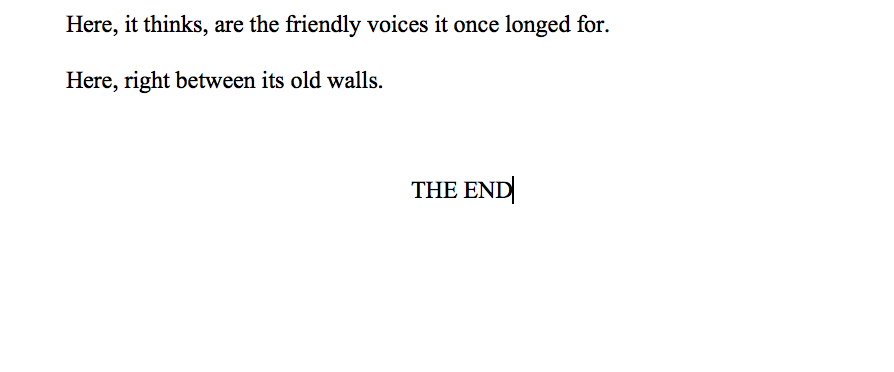
At the very end of your novel, you need to write THE END, just like that, in all caps. This should come just after the final line of your story and should be center-justified.
This helps the editor, agent, and any other beta readers know that they’ve read the complete book and aren’t missing anything.
How to format chapters in Word
Even once you know how to write a book in Word, formatting chapters can seem confusing if you’ve never done it before. But it’s pretty easy.
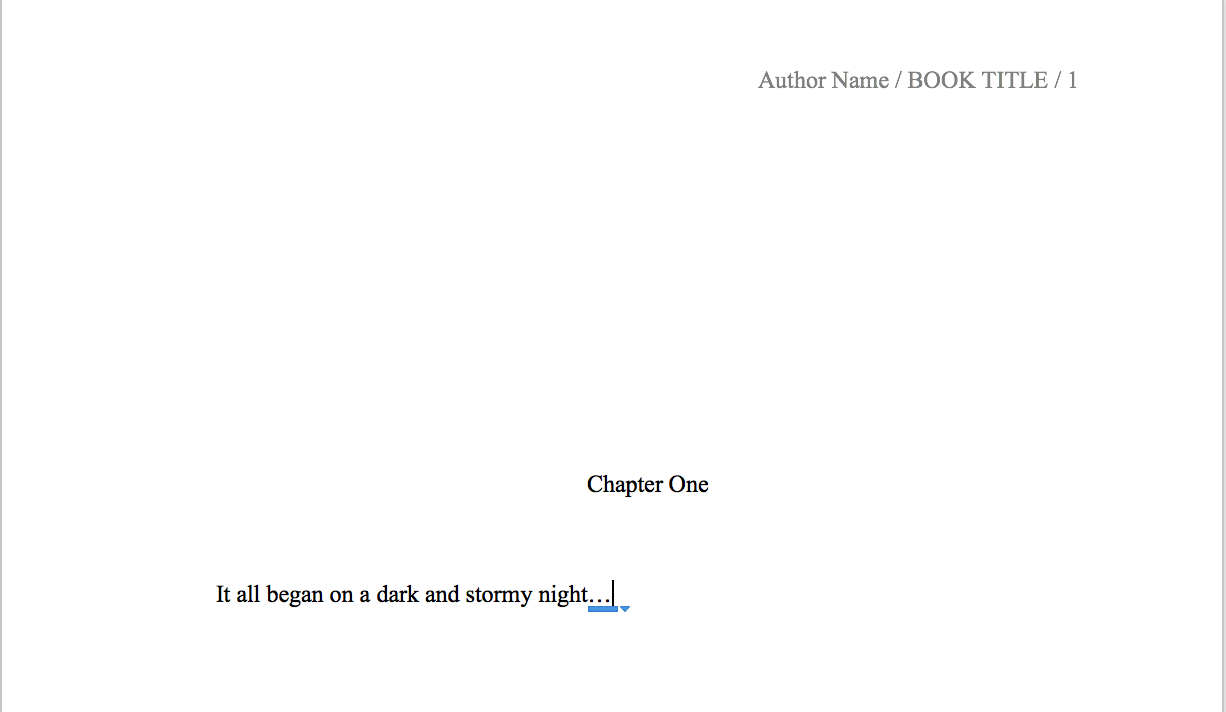
After creating a page break at the end of the previous chapter (or at the end of the title page for the whole book), this is what you should do:
- Navigate 1/3 to 1/2 of the way down the page.
- Center-justify the text and write your chapter title.
- One double-spaced line below that, begin the actual chapter.
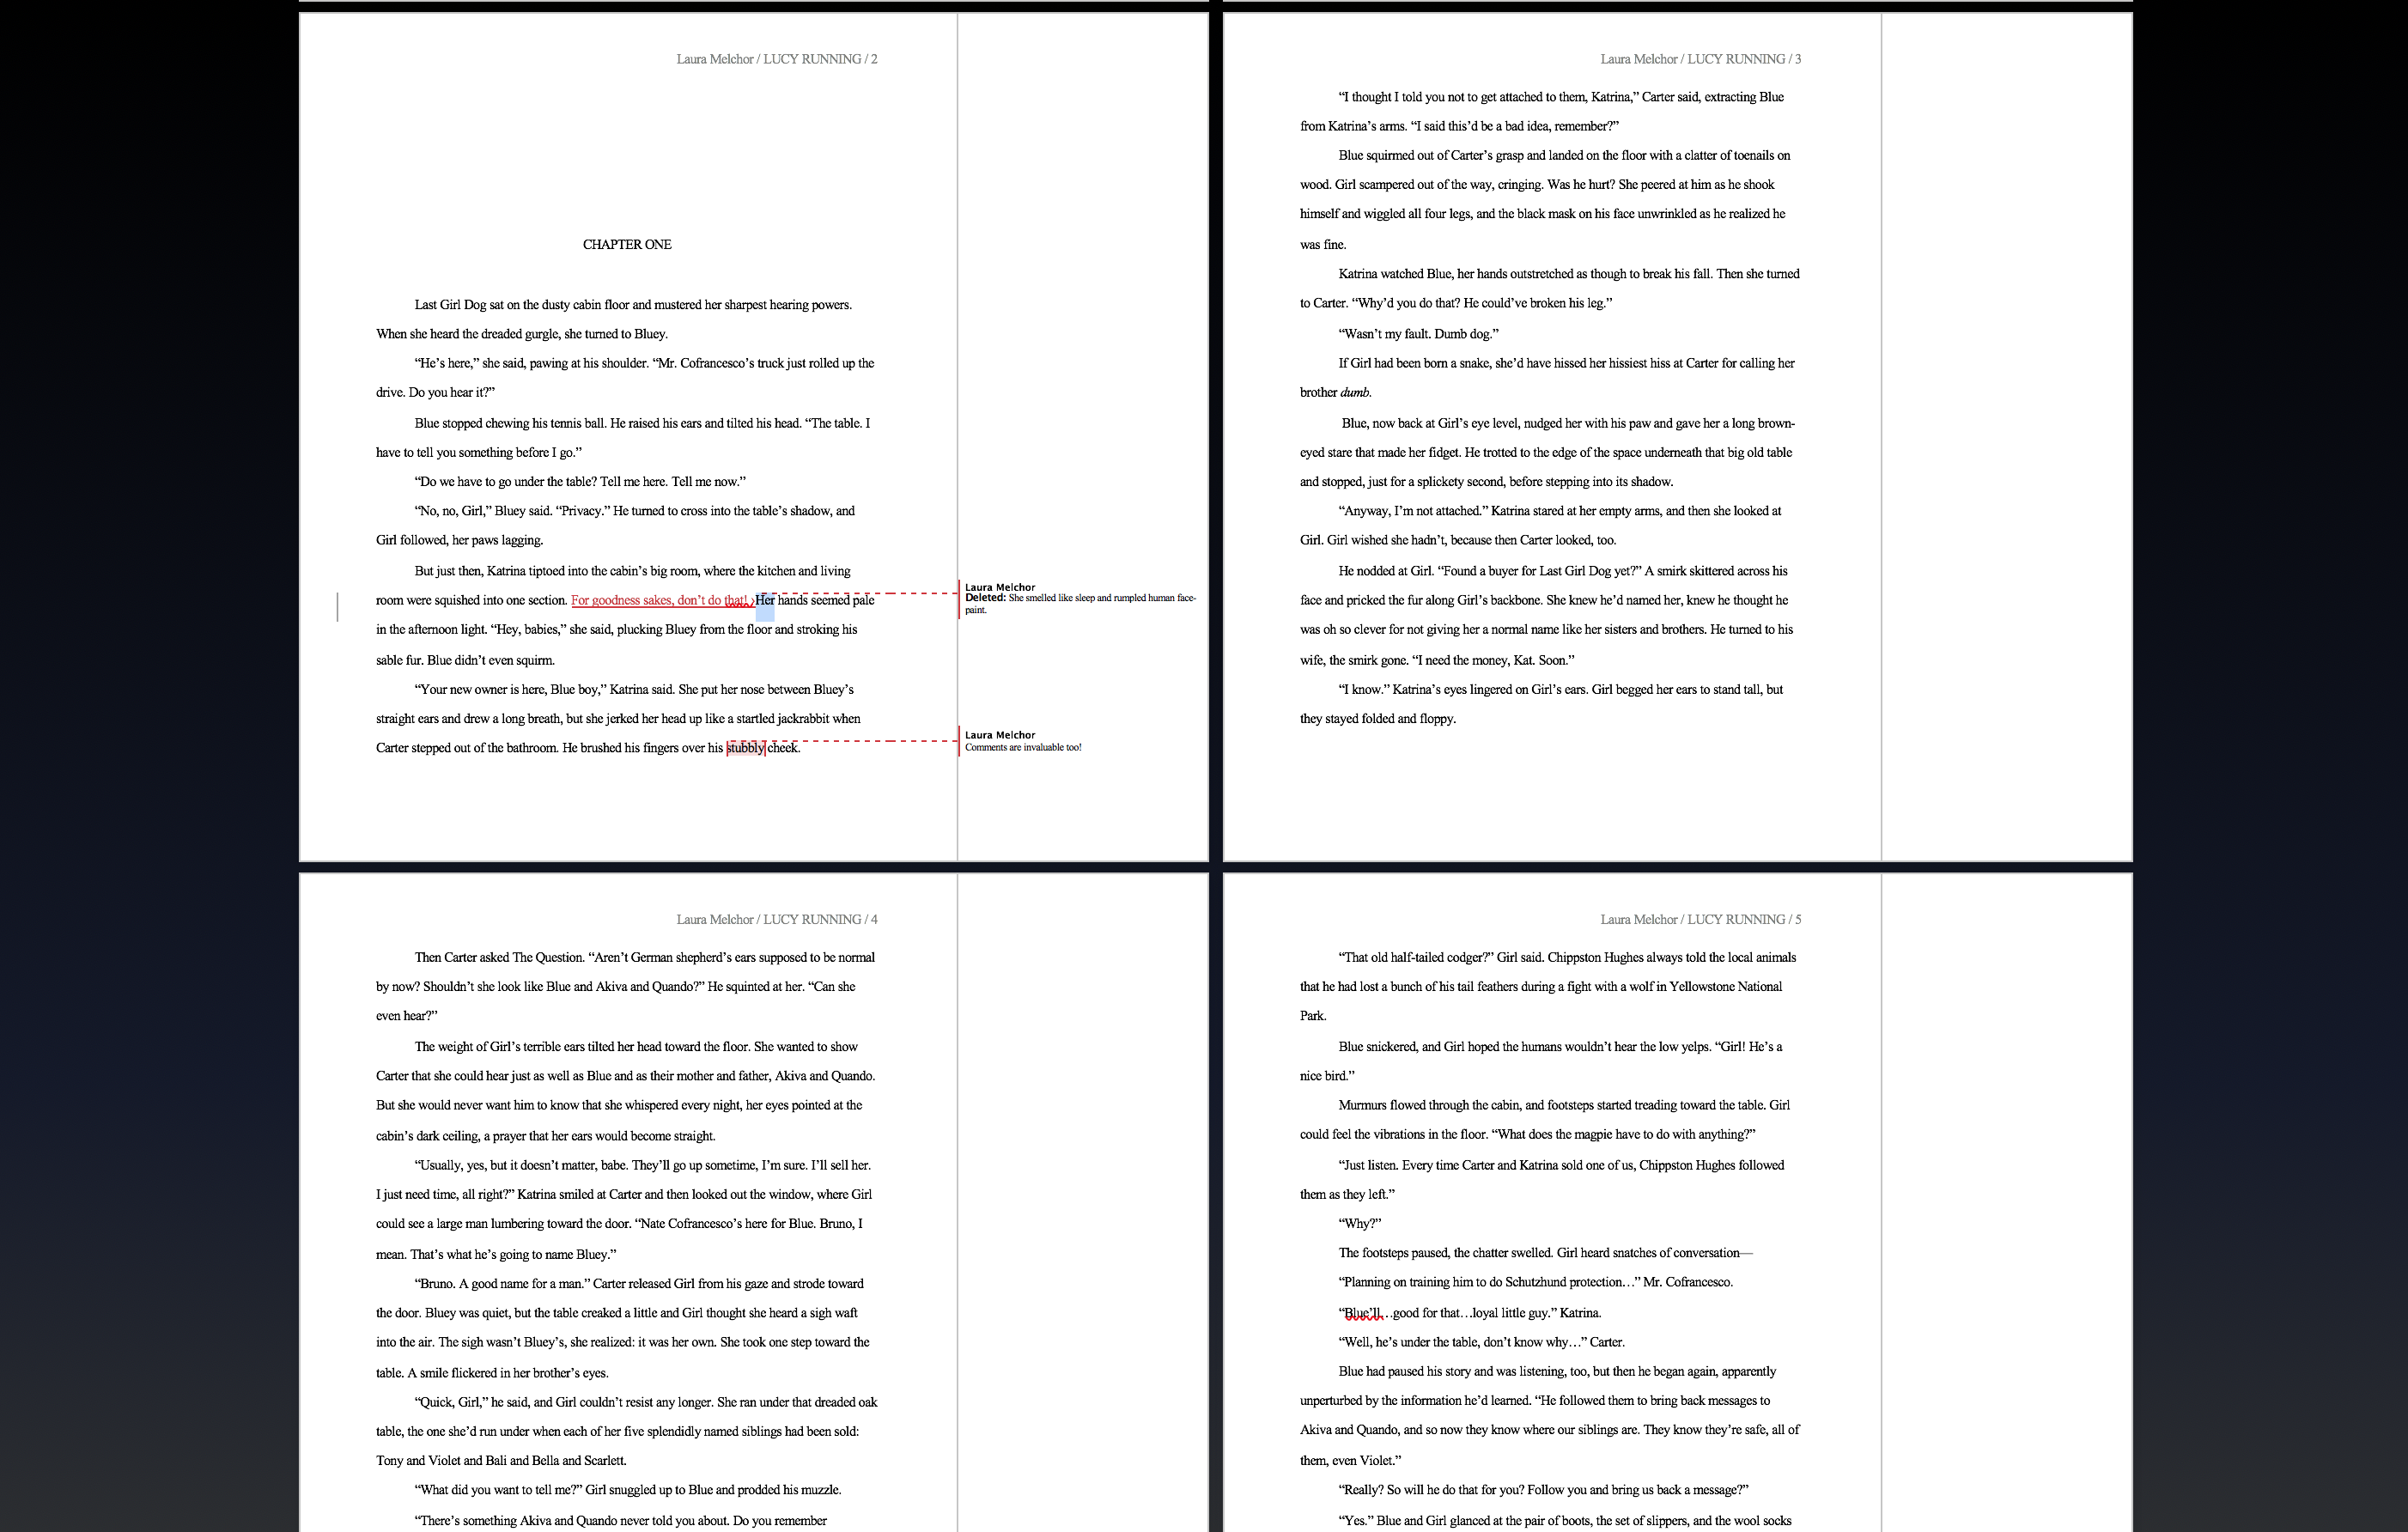
It’ll look like this:
That’s all there is to it!
If you’d like to add a quote to the chapter title, simply put it above or below the Chapter One title, according to your preference. Don’t forget to add that double-spaced line before beginning the body of the first paragraph.
Editing a book in Word
Once you’ve written your entire novel according to this format, you’re ready to edit. Microsoft Word makes editing simple, especially with the following tools.
Find and replace: the best Word tool ever
I absolutely love Advanced Find and Replace. When I’m working on my novels, I often decide to change a character name halfway through the novel. If I had to go through and manually find and re-type the new name, I’d waste valuable writing time.
Instead, I use Advanced Find and Replace.
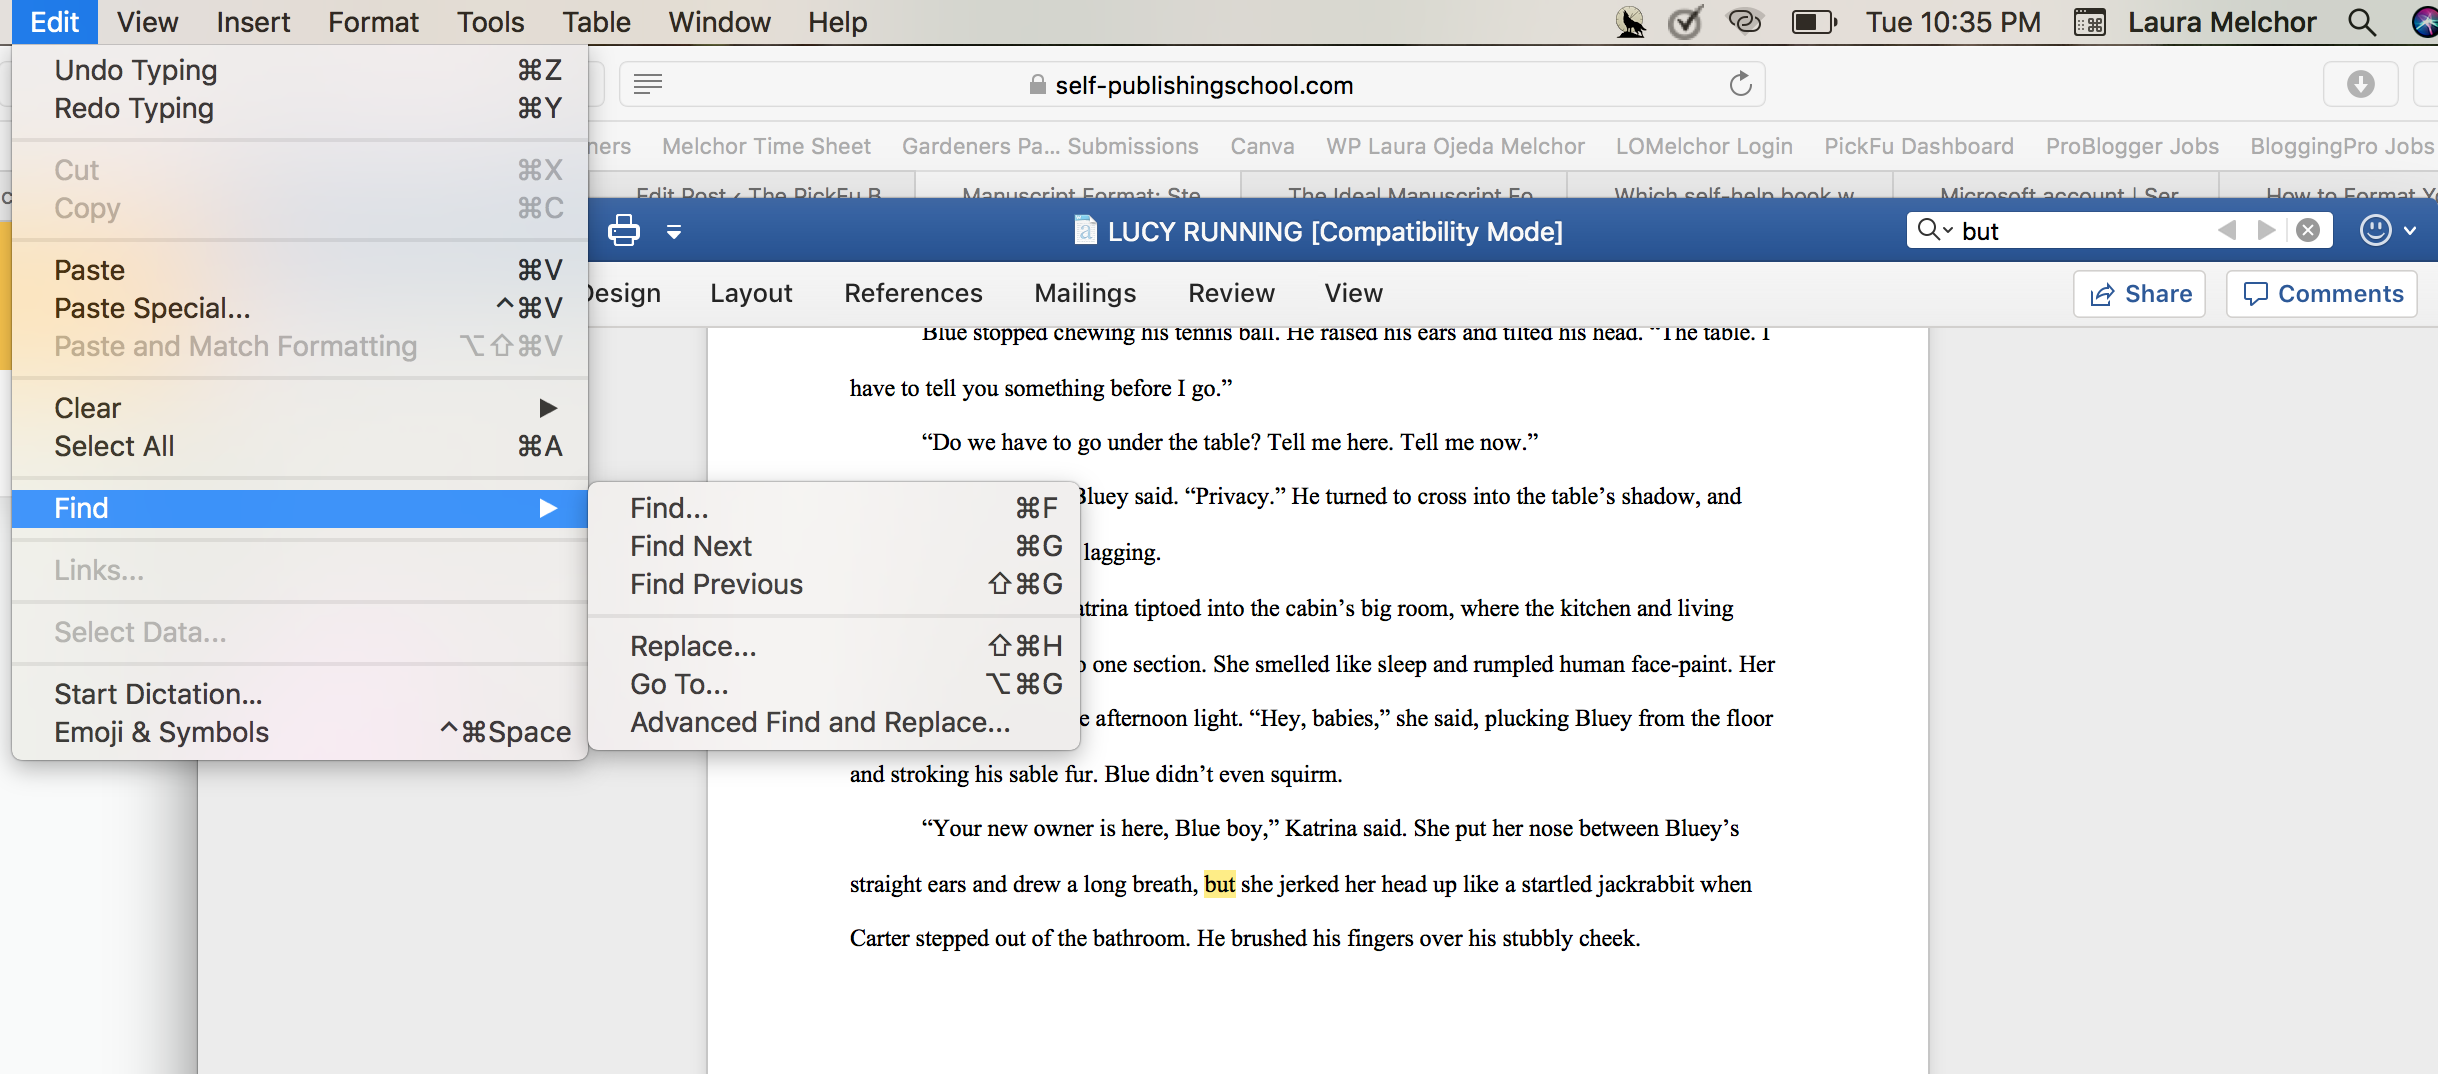
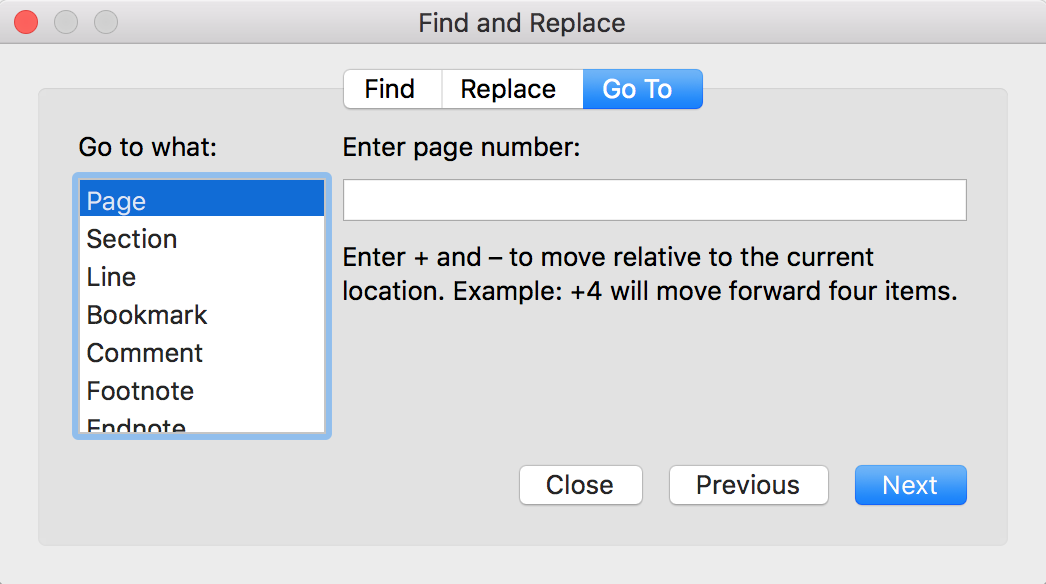
To reach this amazing tool, navigate to Edit > Find > Advanced Find and Replace.
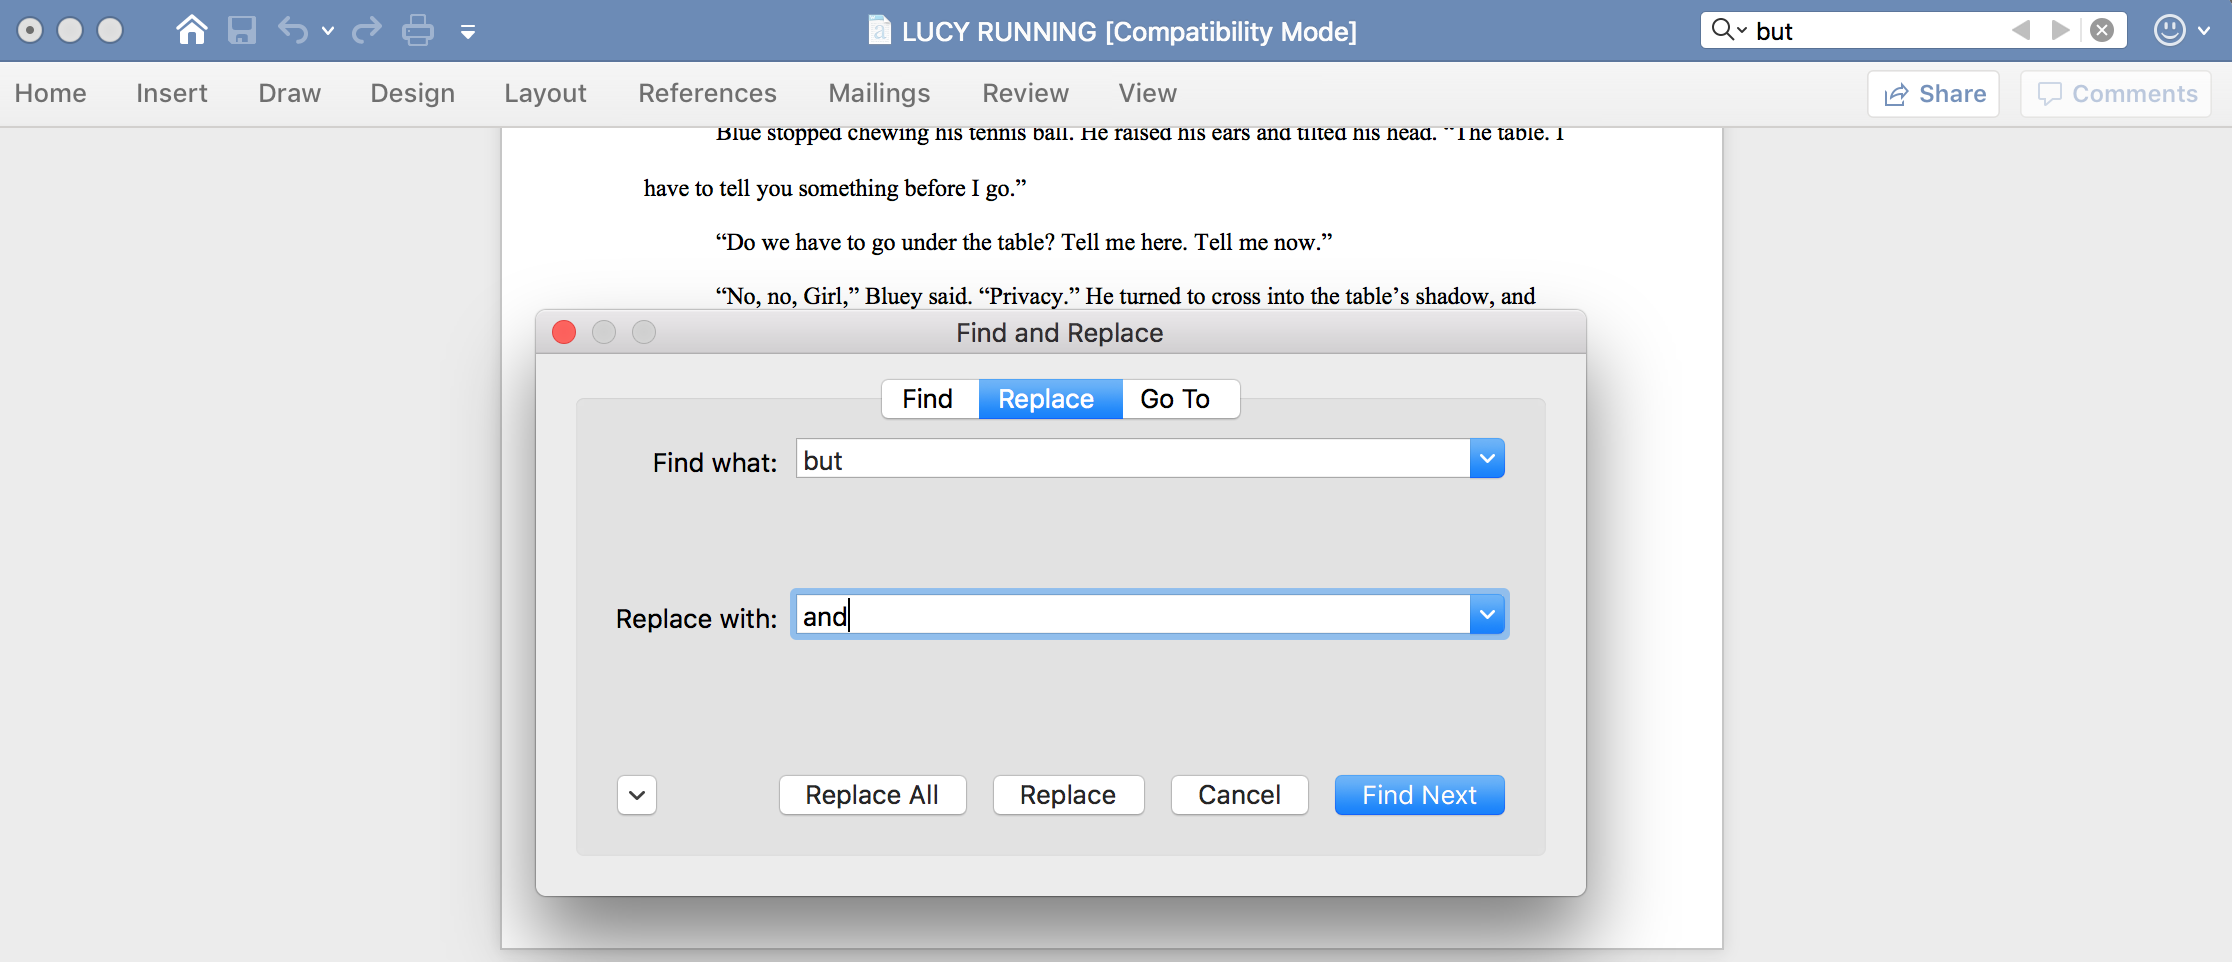
Once you select it, you’ll see this box.
Whatever you type into the Find box, the processor will find in your document. And if you type a replacement word, it will take all those hundreds of words and replace them with your new desired word or name — an invaluable tool for any writer who’s learning how to write a book in Word!
Another helpful feature of this tool is Go To, which enables you to navigate directly to a specific page, chapter, comment, and more.
Comments
Speaking of comments, those are helpful, too. You can write notes to yourself, or other readers of your work can leave comments for you.
Track changes
One of the best things about figuring out how to write a book in Word is discovering the Track Changes feature. Often, an editor or agent will ask you to make edits and revisions in Track Changes so that they can easily read what you changed (and not have to re-read the entire book).
Or maybe you want to keep track of what you decide to remove and revise.
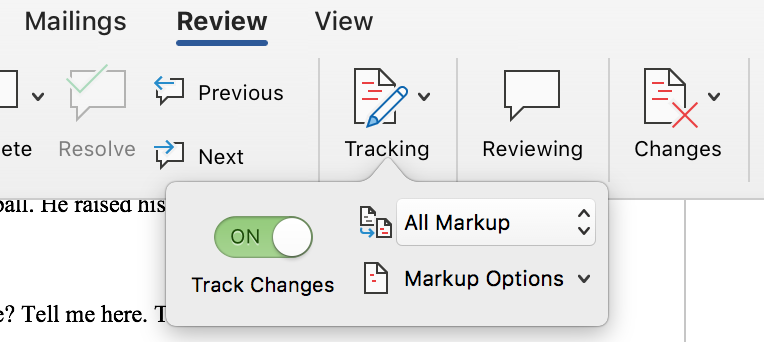
All you have to do to edit in track changes is navigate to Review > Tracking > Track Changes > On.
Now when you delete and add words, it’ll look like this:
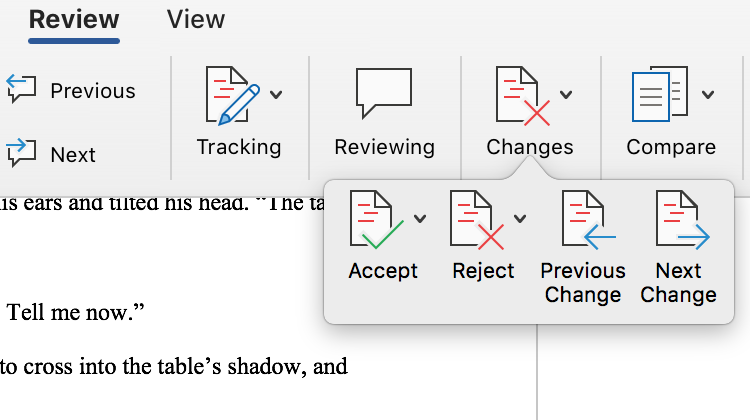
If you decide you like the changes, or if your editor makes changes and wants you to approve or reject them, simply navigate to Changes, where you can accept or reject each change or several all at once.
These are some of my favorite tools for writing a book in Word, and they’re the most common tools used by my author friends. But there are dozens more. Spend time poking around Word to see which ones serve you best.
Previewing
Want to see what your book looks like all formatted in Word?
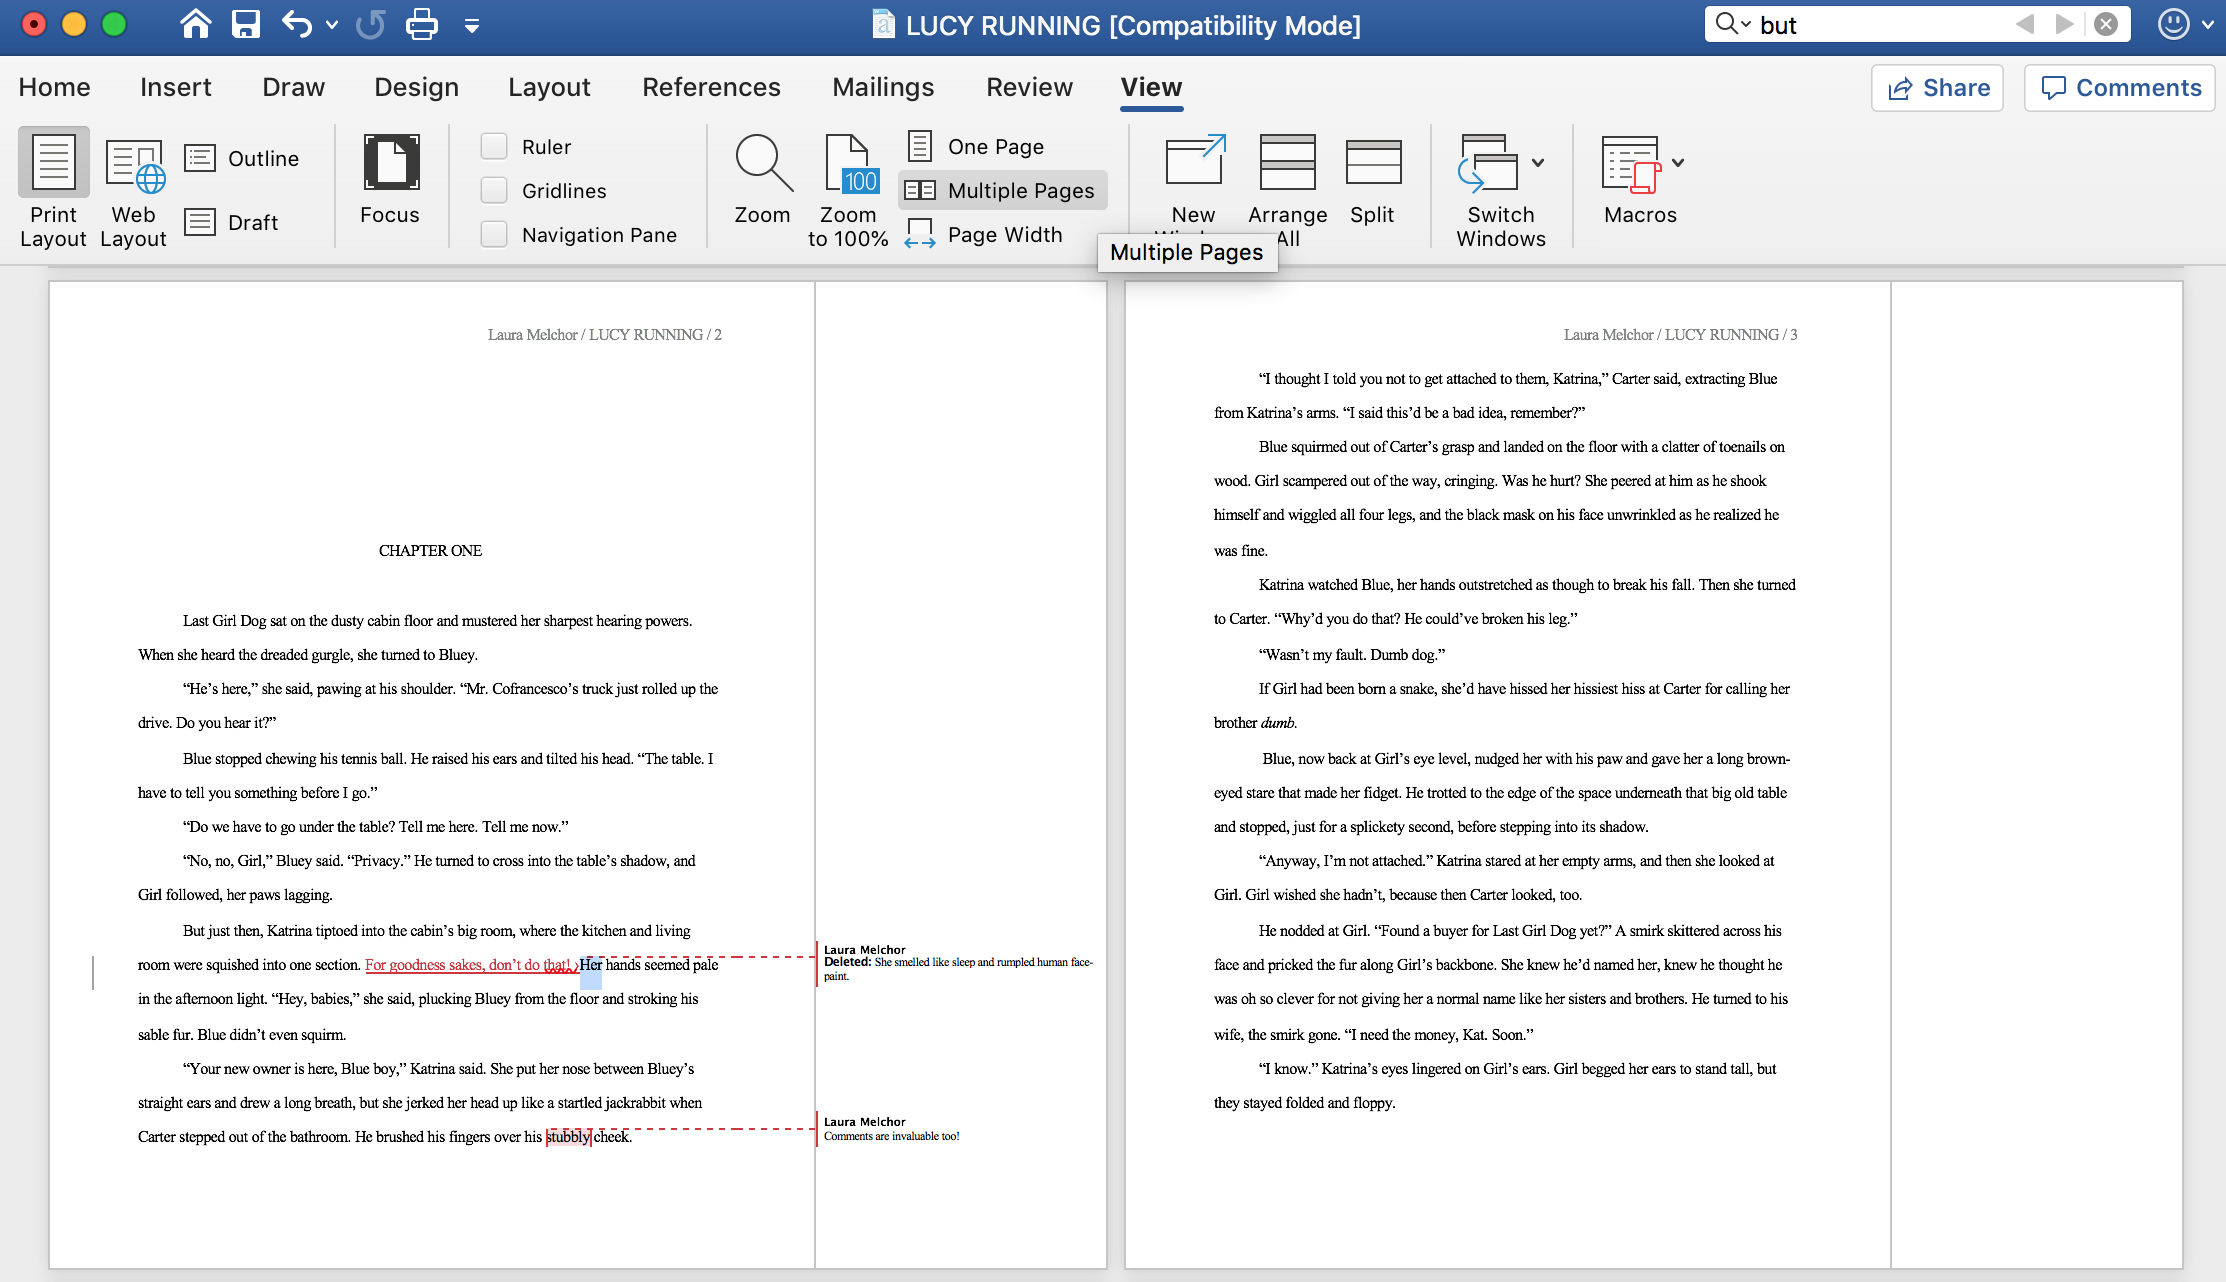
You can preview the pages from afar by navigating to View > Multiple Pages. Doing so previews your formatting from a distance, as it were, evaluating how several pages look at once.
If you want to preview everything in deep focus mode, click on Focus in the top toolbar. Use it anytime you’re writing, editing, revising, or previewing to keep distractions away from the margins of your laptop or computer.
Uploading to Amazon
Now that you’ve finished formatting and know how to write a
The properly formatted book will convert smoothly to Kindle Direct Publishing, and then you can tinker with fonts and other stylistic aspects of your book before publication.
See more of our tips for publishing on Kindle here.
Sending your book to agents and editors
If you plan to send your book to agents, editors, or publishers, congratulations! It’s already in the correct base format.
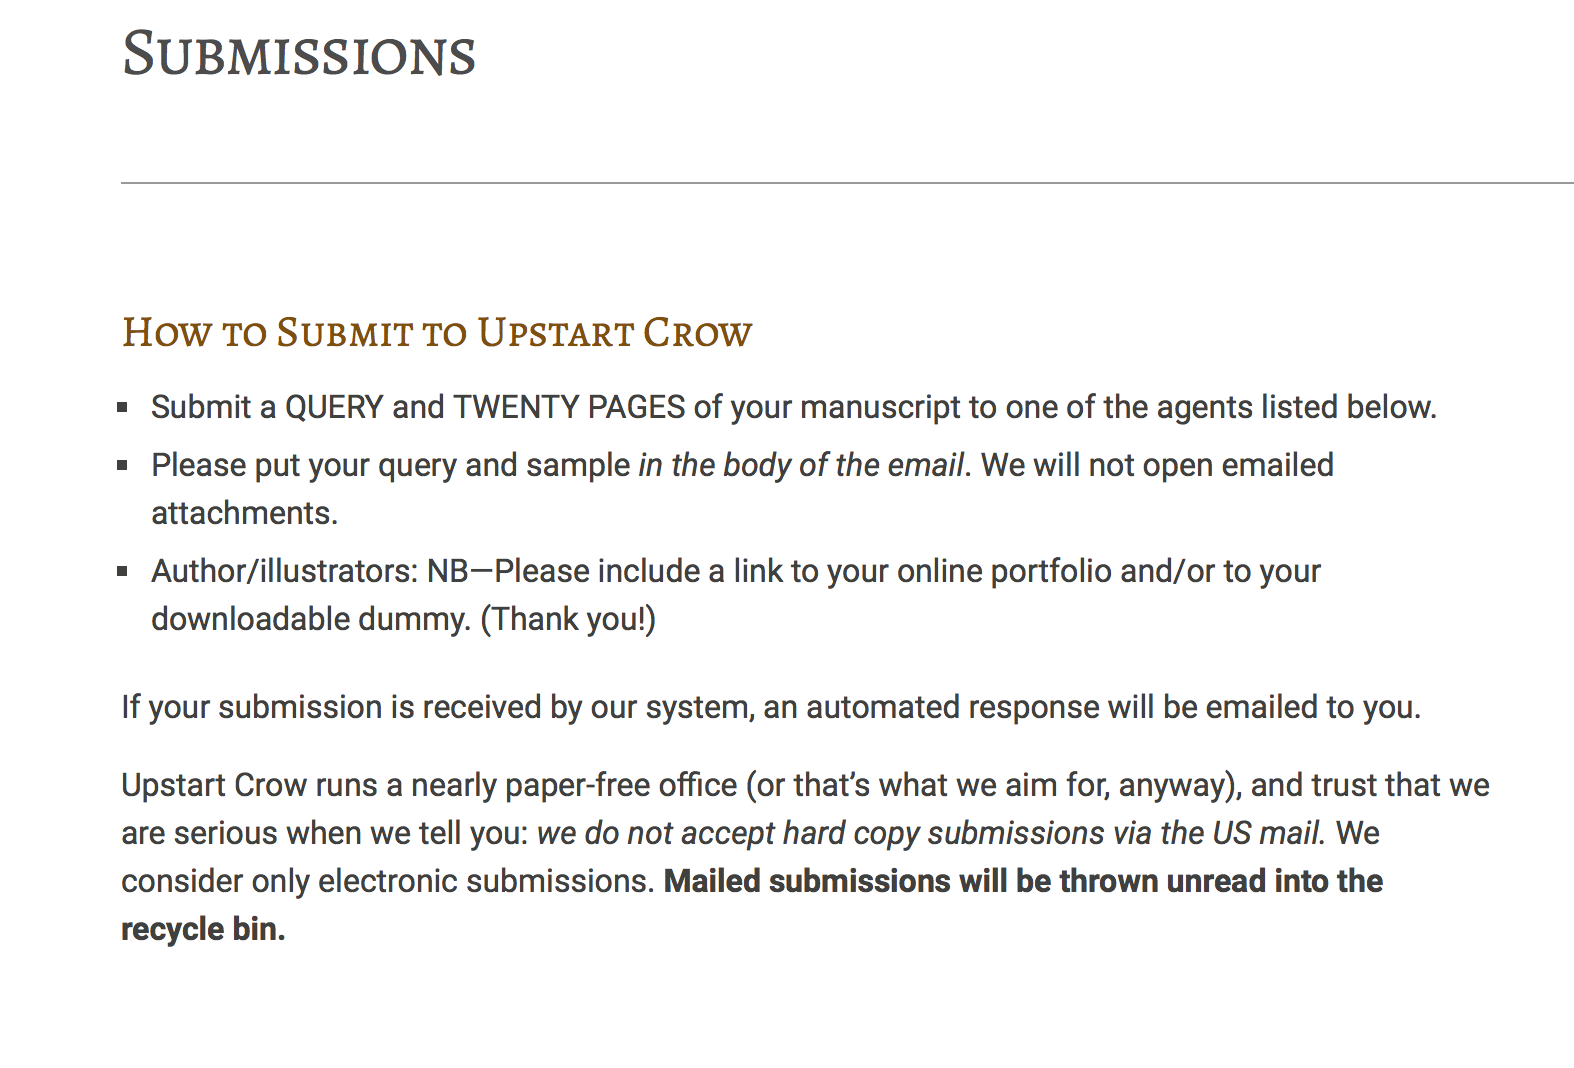
You now need to navigate to your desired agent, editor, or publisher’s Submission Requirements page and follow their rules to the letter. If you don’t, they’ll assume you don’t care enough about working with them to format everything like they want you to, and they won’t consider you or your work.
On my literary agent’s agency submission page, the directions ask you to copy and paste your formatted manuscript in the body of the email — not in a Word attachment.
Other agencies will want you to attach a Word document containing the first 20 pages, or the first 5. It all depends.
All that matters is that you take your perfectly formatted Word document and do exactly what they ask.
Happy submitting!
Testing with PickFu
Before you rush off to submit your book to editors or publish it on Kindle Direct Publishing, test your book synopsis, title, and cove
PickFu respondents will give you valuable votes and feedback on your book, helping you connect with readers around the globe.
Once you’re done learning how to write a book in Word, create your first poll and get started on making those publishing dreams come alive!


